How to use Pub/Sub in your serverless app
In this example we will look at how to use SNS to create a pub/sub system in our serverless app using Serverless Stack (SST). We’ll be creating a simple checkout flow.
Requirements
- Node.js >= 10.15.1
- We’ll be using TypeScript
- An AWS account with the AWS CLI configured locally
Create an SST app
 Let’s start by creating an SST app.
$ npm init sst -- typescript-starter pub-sub
$ cd pub-sub
By default our app will be deployed to an environment (or stage) called dev and the us-east-1 AWS region. This can be changed in the sst.json in your project root.
{
  "name": "pub-sub",
  "region": "us-east-1",
  "main": "stacks/index.ts"
}
Project layout
An SST app is made up of two parts.
-
stacks/— App InfrastructureThe code that describes the infrastructure of your serverless app is placed in the
stacks/directory of your project. SST uses AWS CDK, to create the infrastructure. -
backend/— App CodeThe code that’s run when your API is invoked is placed in the
backend/directory of your project.
Adding SNS Topic
Amazon SNS is a reliable and high-throughput messaging service. You are charged based on the number of API requests made to SNS. And you won’t get charged if you are not using it.
 Replace the
 stacks/MyStack.ts with the following.
import { Api, StackContext, Topic } from "@serverless-stack/resources";

export function MyStack({ stack }: StackContext) {
  // Create Topic
  const topic = new Topic(stack, "Ordered", {
    subscribers: {
      receipt: "functions/receipt.handler",
      shipping: "functions/shipping.handler",
    },
  });
This creates an SNS topic using Topic. And it has two subscribers. Meaning when the topic is published, both the functions will get run.
Setting up the API
Now let’s add the API.
 Add this below the
 Topic definition in stacks/MyStack.ts.
// Create the HTTP API
const api = new Api(stack, "Api", {
  defaults: {
    function: {
      // Pass in the topic to our API
      environment: {
        topicArn: topic.topicArn,
      },
    },
  },
  routes: {
    "POST /order": "functions/order.handler",
  },
});

// Allow the API to publish the topic
api.attachPermissions([topic]);

// Show the API endpoint in the output
stack.addOutputs({
  ApiEndpoint: api.url,
});
Our API simply has one endpoint (/order). When we make a POST request to this endpoint the Lambda function called handler in backend/functions/order.ts will get invoked.
We’ll also pass in the arn of our SNS topic to our API as an environment variable called topicArn. And we allow our API to publish to the topic we just created.
Adding function code
We will create three functions, one handling the /order API request, and two for the topic subscribers.
 Add a
Add a backend/functions/order.ts.
export async function handler() {
  console.log("Order confirmed!");
  return {
    statusCode: 200,
    body: JSON.stringify({ status: "successful" }),
  };
}
 Add a
Add a backend/functions/receipt.ts.
export async function handler() {
  console.log("Receipt sent!");
  return {};
}
 Add a
Add a backend/functions/shipping.ts.
export async function handler() {
  console.log("Item shipped!");
  return {};
}
Now let’s test our new API.
Starting your dev environment
 SST features a Live Lambda Development environment that allows you to work on your serverless apps live.
$ npm start
The first time you run this command it’ll take a couple of minutes to deploy your app and a debug stack to power the Live Lambda Development environment.
===============
 Deploying app
===============

Preparing your SST app
Transpiling source
Linting source
Deploying stacks
dev-pub-sub-my-stack: deploying...

 ✅  dev-pub-sub-my-stack


Stack dev-pub-sub-my-stack
  Status: deployed
  Outputs:
    ApiEndpoint: https://gevkgi575a.execute-api.us-east-1.amazonaws.com
The ApiEndpoint is the API we just created.
Let’s test our endpoint using the integrated SST Console. The SST Console is a web based dashboard to manage your SST apps Learn more about it in our docs.
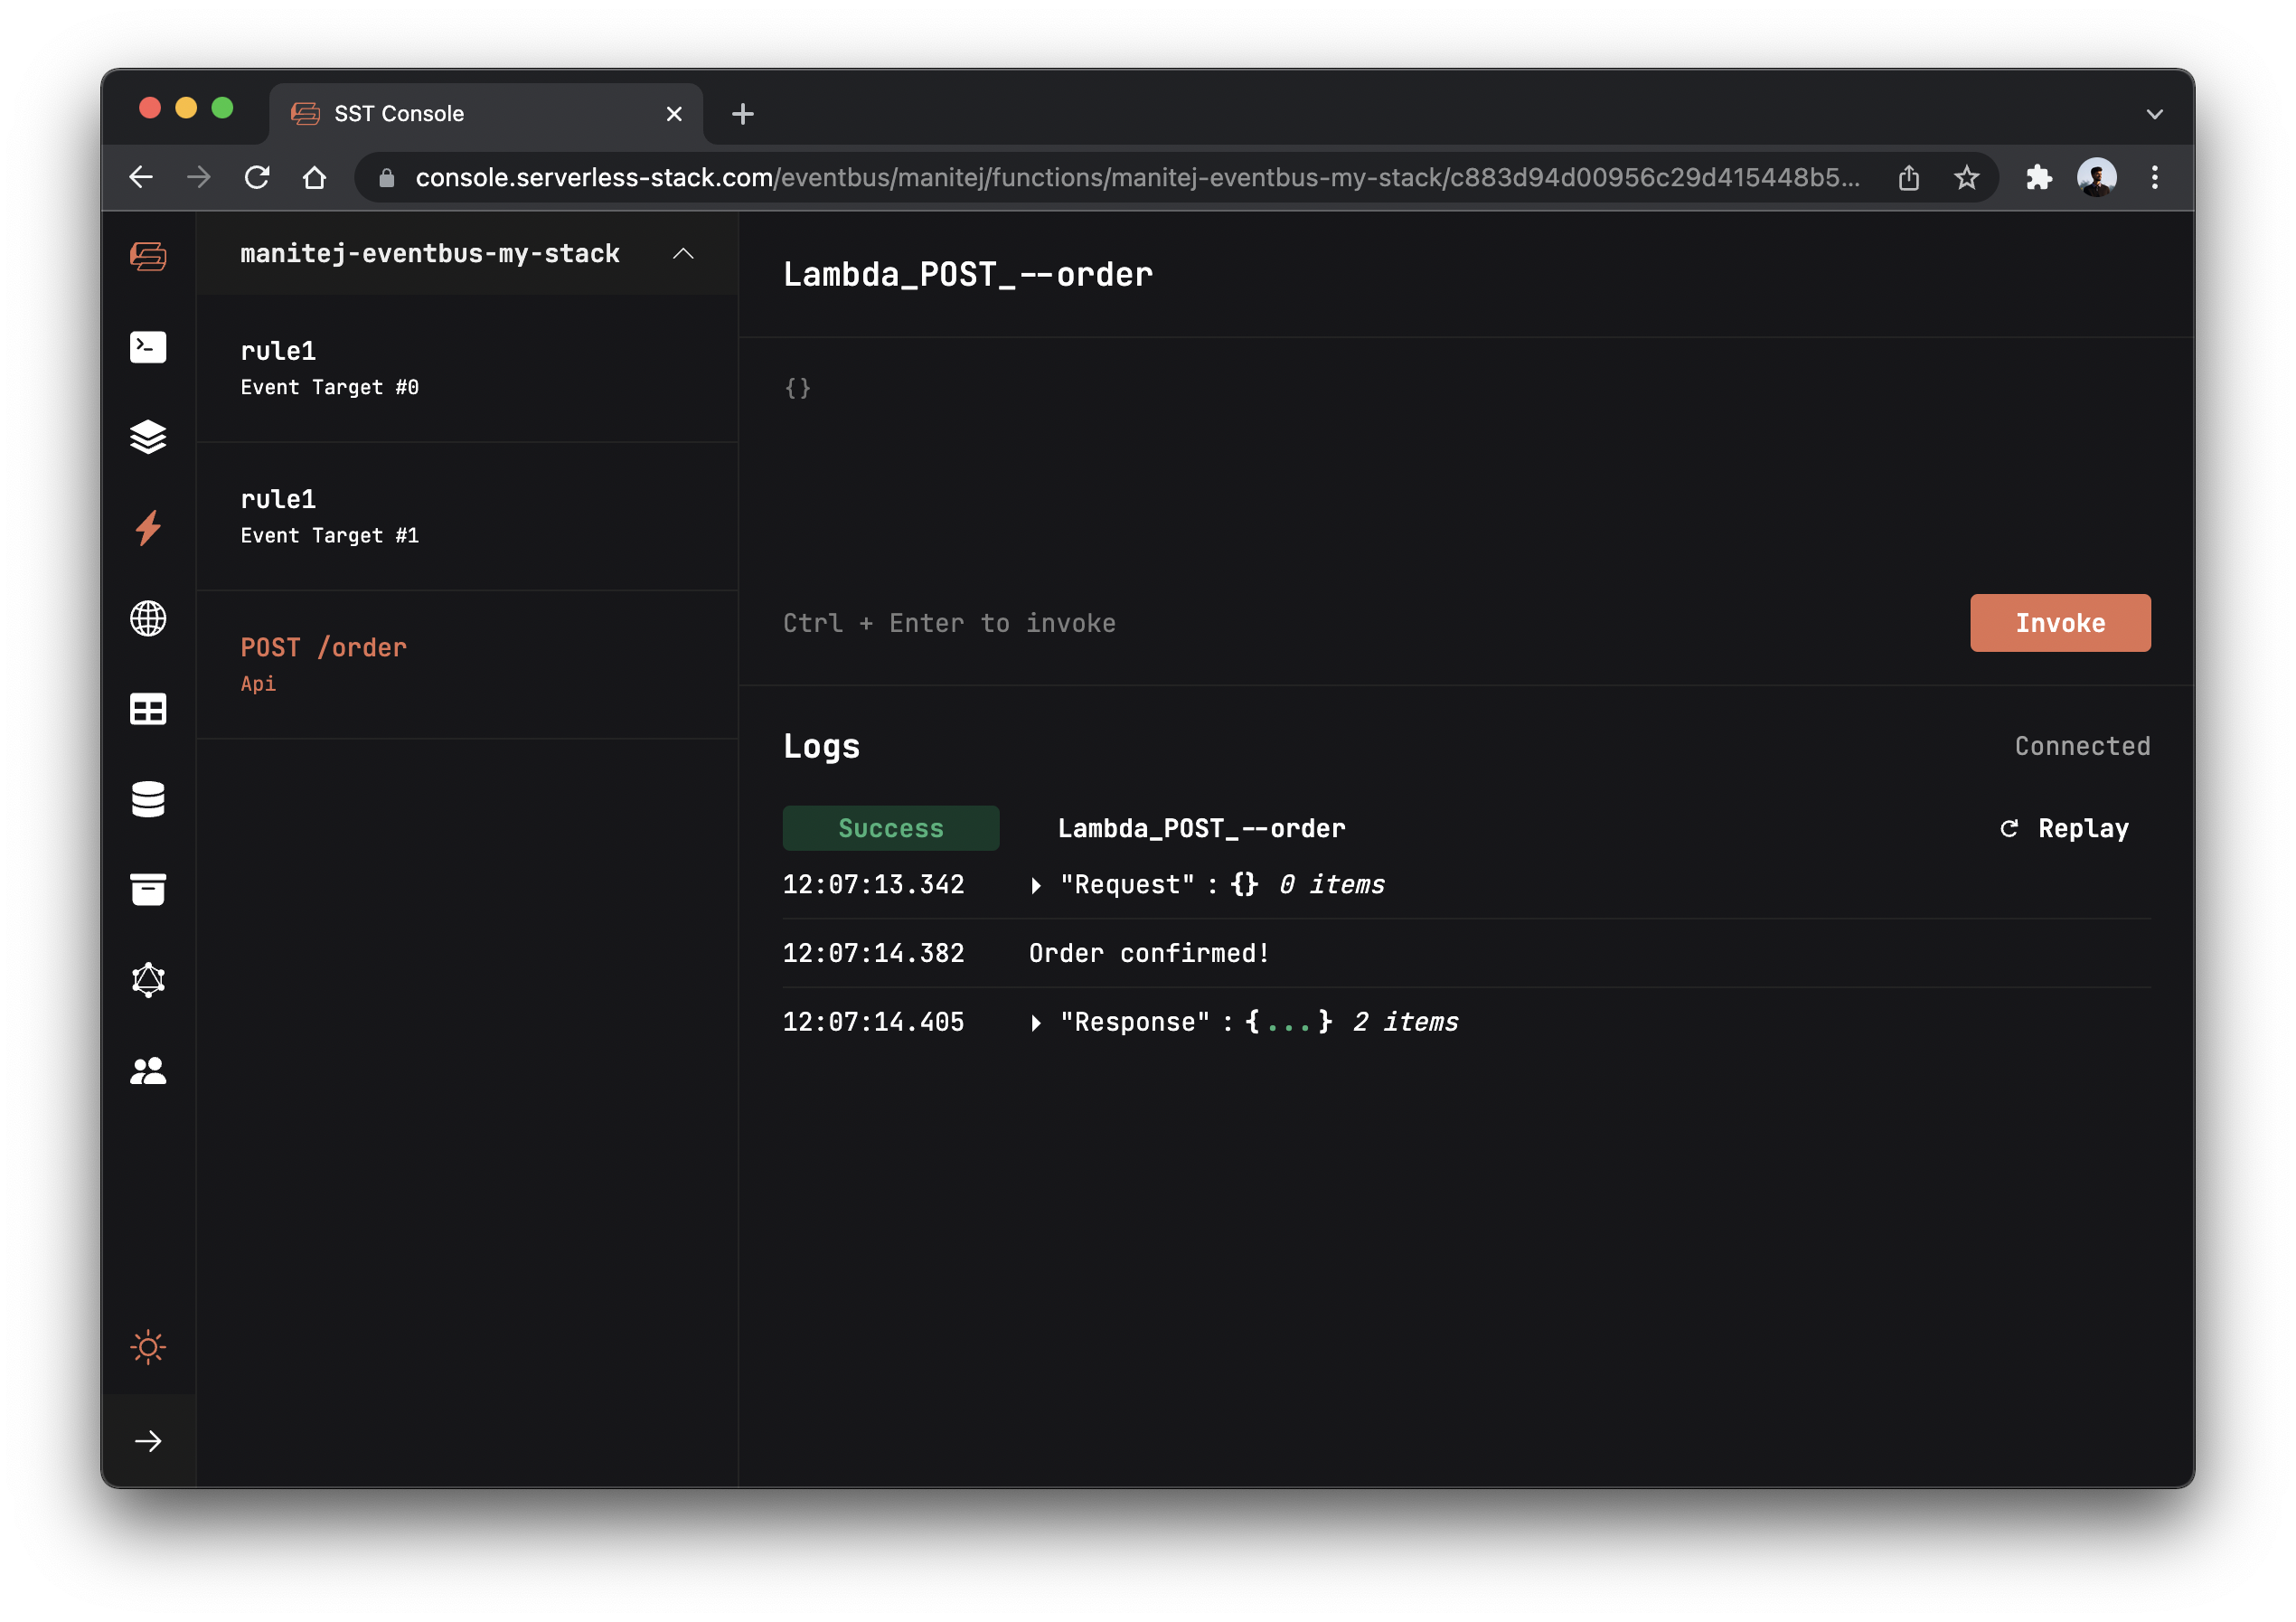
Go to the Functions tab and click the Invoke button of the POST /order function to send a POST request.

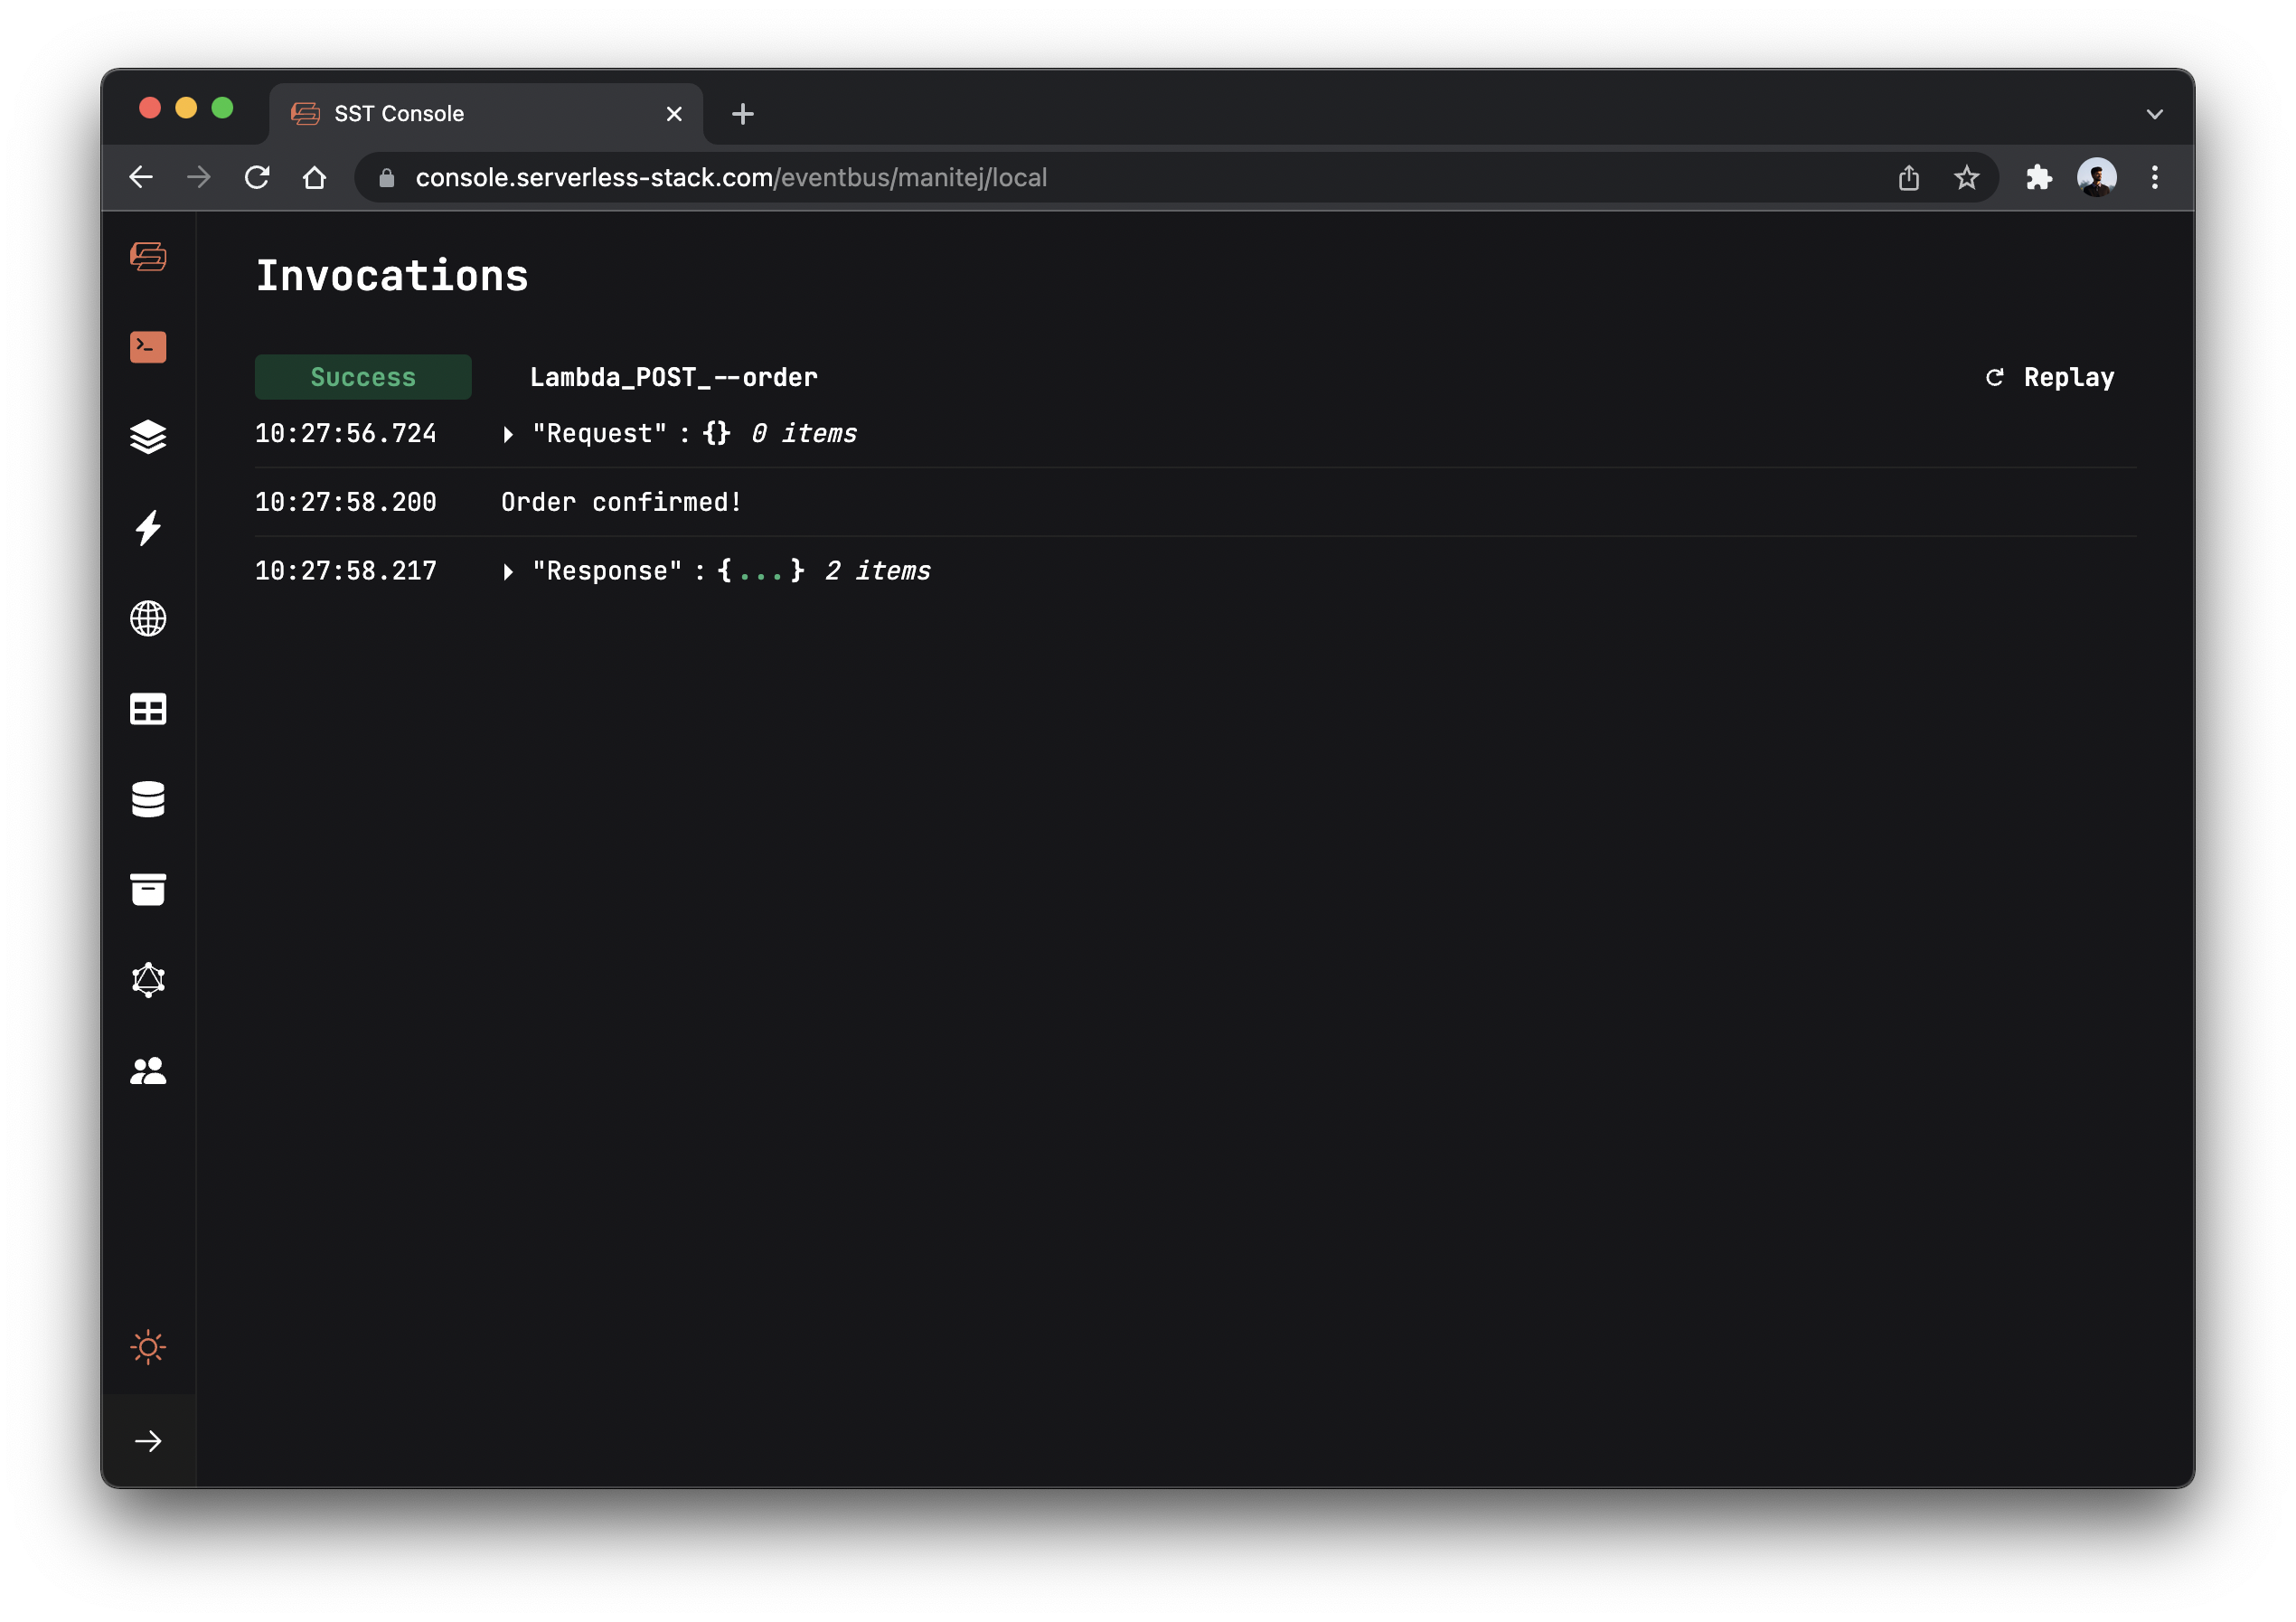
After you see a success status in the logs, go to the Local tab in the console to see all function invocations. Local tab displays real-time logs from your Live Lambda Dev environment.

You should see Order confirmed! logged in the console.
Publishing to our topic
Now let’s publish a message to our topic.
 Replace the
 backend/functions/order.ts with the following.
import AWS from "aws-sdk";

const sns = new AWS.SNS();

export async function handler() {
  // Publish a message to topic
  await sns
    .publish({
      // Get the topic from the environment variable
      TopicArn: process.env.topicArn,
      Message: JSON.stringify({ ordered: true }),
      MessageStructure: "string",
    })
    .promise();

  console.log("Order confirmed!");

  return {
    statusCode: 200,
    body: JSON.stringify({ status: "successful" }),
  };
}
Here we are getting the topic arn from the environment variable, and then publishing a message to it.
 Let’s install the
 aws-sdk package in the backend/ folder.
$ npm install aws-sdk
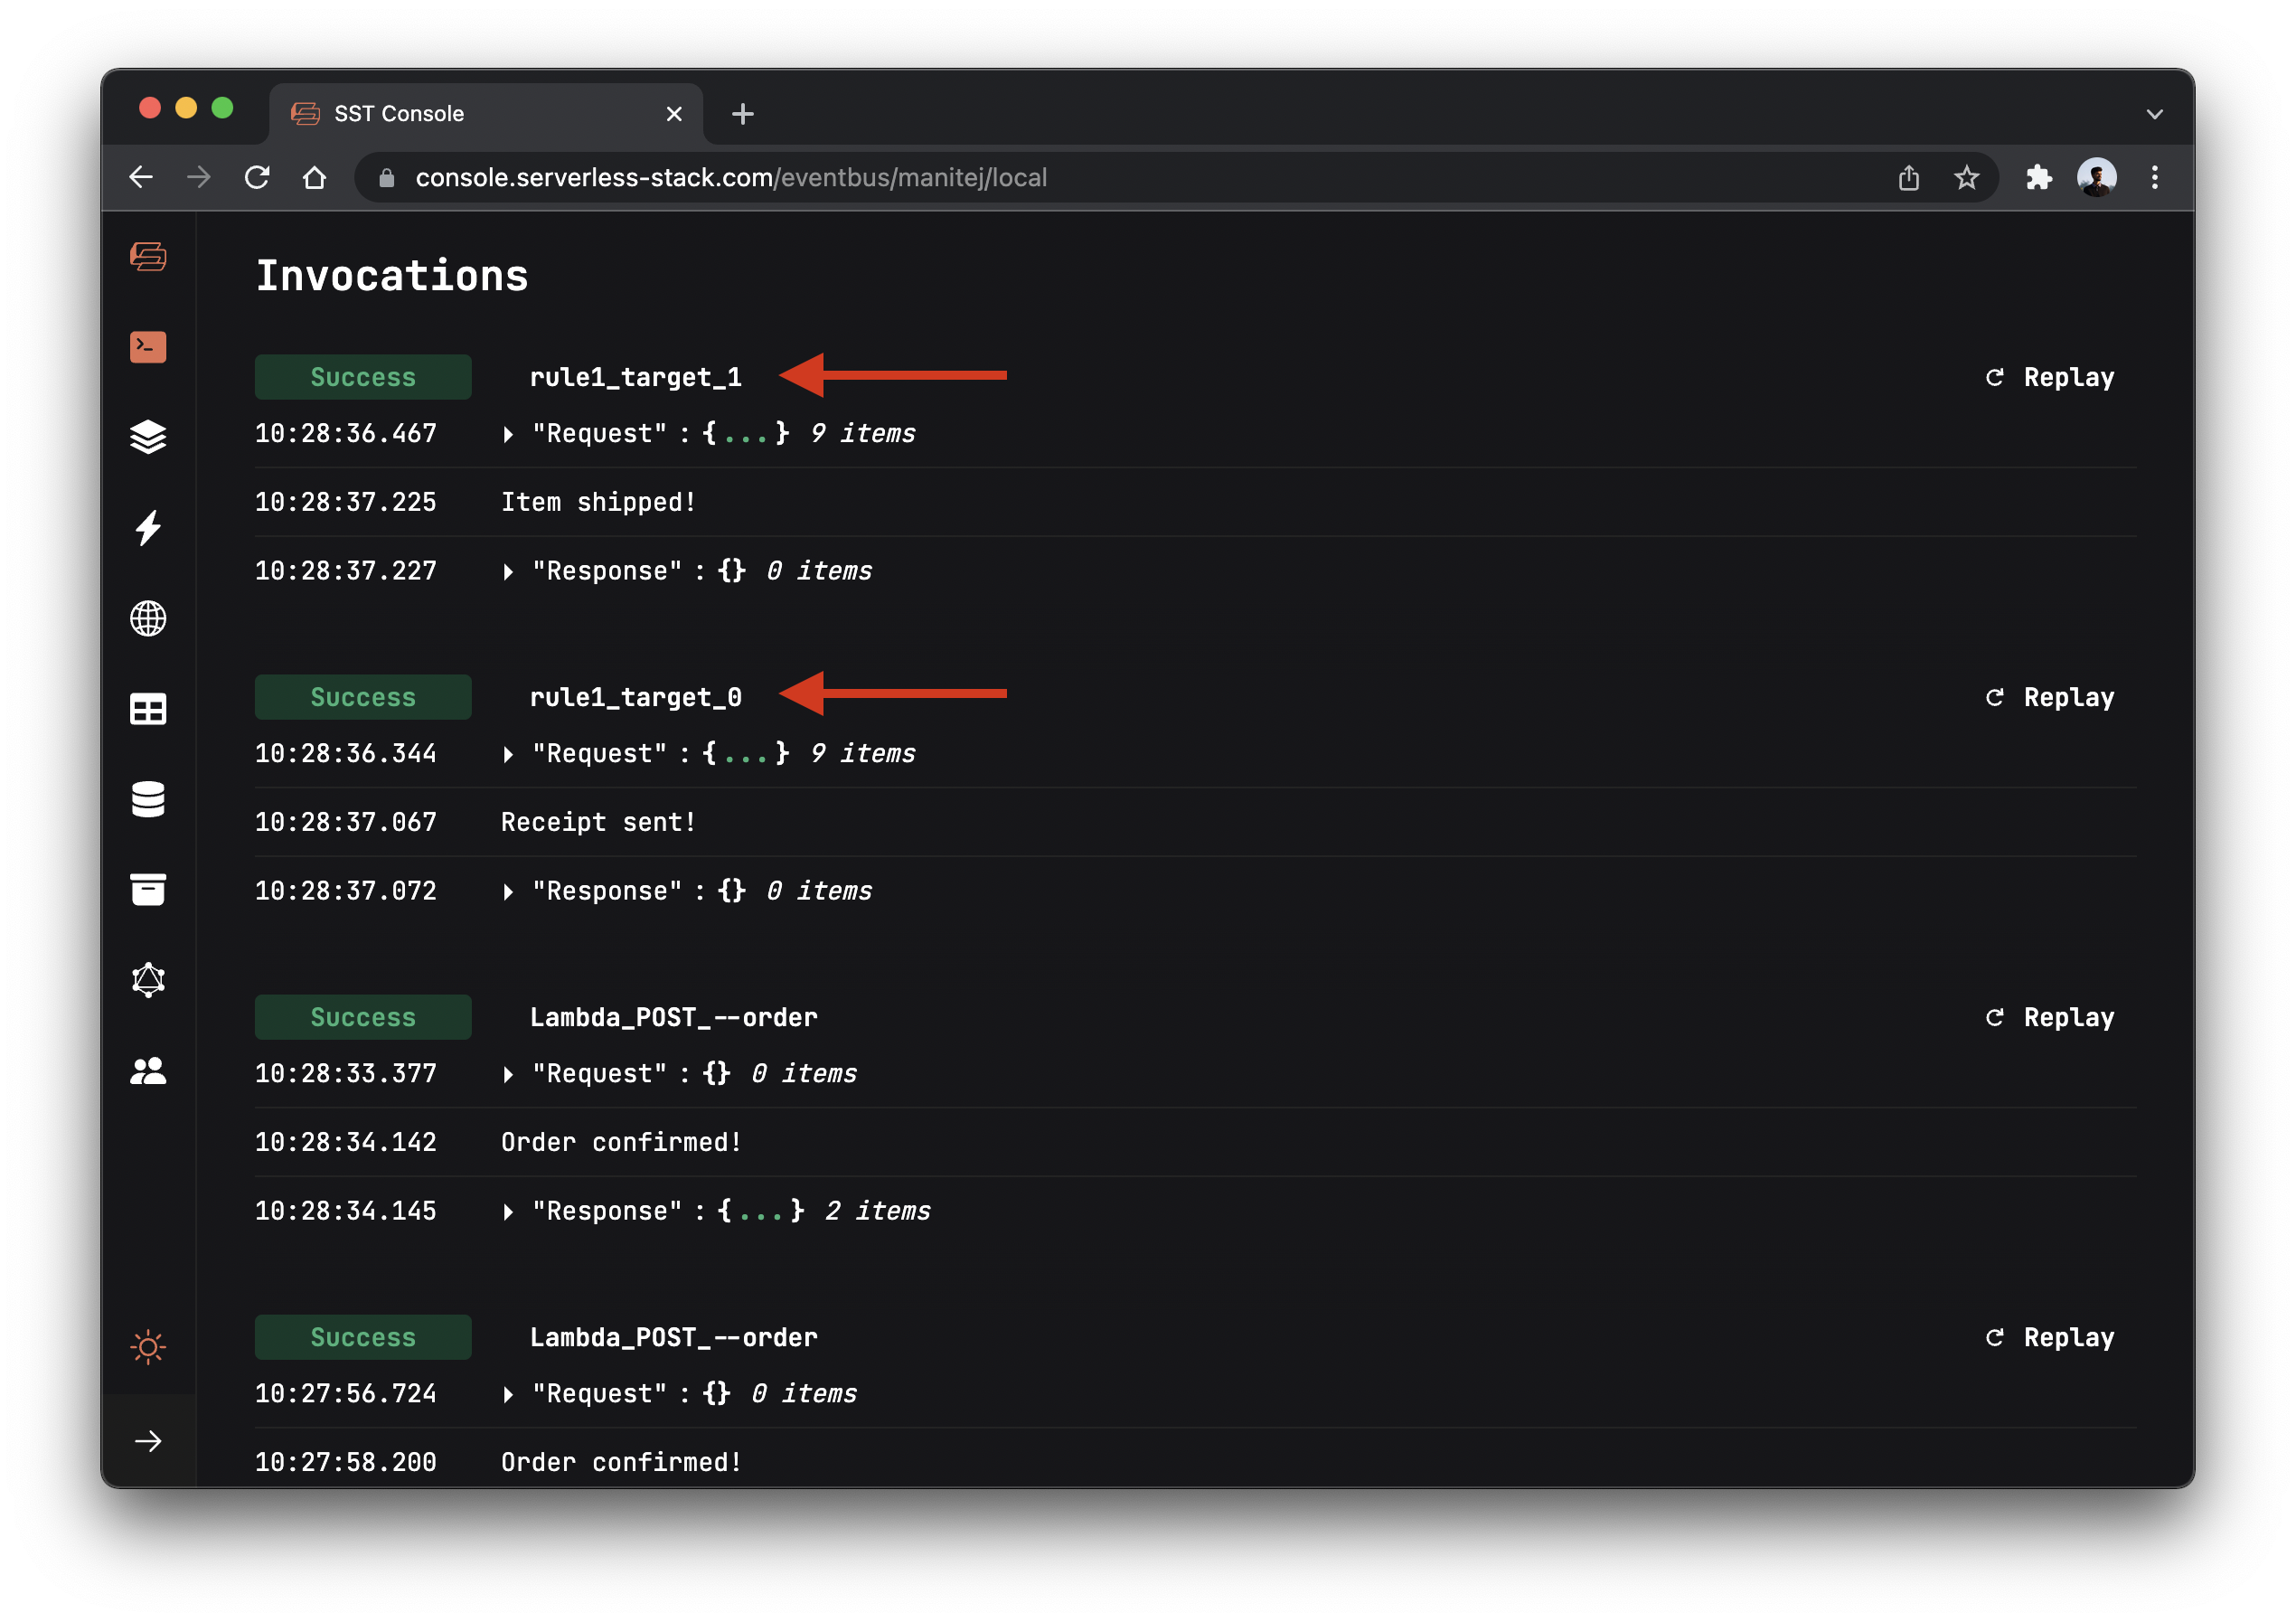
And now if you head over to your console and invoke the function again, You’ll notice in the Local tab that our EventBus targets are called. And you should see Receipt sent! and Item shipped! printed out.

Deploying to prod
 To wrap things up we’ll deploy our app to prod.
$ npm run deploy -- --stage prod
This allows us to separate our environments, so when we are working in dev, it doesn’t break the API for our users.
Cleaning up
Finally, you can remove the resources created in this example using the following commands.
$ npm run remove
$ npm run remove -- --stage prod
Conclusion
And that’s it! We’ve got a completely serverless checkout system, powered by SNS. Check out the repo below for the code we used in this example. And leave a comment if you have any questions!
Example repo for reference
github.com/serverless-stack/serverless-stack/tree/master/examples/pub-subFor help and discussion
Comments on this exampleMore Examples
APIs
-
REST API
Building a simple REST API.
-
WebSocket API
Building a simple WebSocket API.
-
Go REST API
Building a REST API with Golang.
-
Custom Domains
Using a custom domain in an API.
Web Apps
-
React.js
Full-stack React app with a serverless API.
-
Next.js
Full-stack Next.js app with DynamoDB.
-
Vue.js
Full-stack Next.js app with a serverless API.
-
Svelte
Full-stack Svelte app with a serverless API.
-
Gatsby
Full-stack Gatsby app with a serverless API.
-
Angular
Full-stack Angular app with a serverless API.
Mobile Apps

GraphQL
Databases
-
DynamoDB
Using DynamoDB in a serverless API.
-
MongoDB Atlas
Using MongoDB Atlas in a serverless API.
-
PostgreSQL
Using PostgreSQL and Aurora in a serverless API.
-
CRUD DynamoDB
Building a CRUD API with DynamoDB.
-
PlanetScale
Using PlanetScale in a serverless API.
Authentication
Using AWS IAM
-
Cognito IAM
Authenticating with Cognito User Pool and Identity Pool.
-
Facebook Auth
Authenticating a serverless API with Facebook.
-
Twitter Auth
Authenticating a serverless API with Twitter.
-
Auth0 IAM
Authenticating a serverless API with Auth0.
Using JWT
-
Cognito JWT
Adding JWT authentication with Cognito.
-
Auth0 JWT
Adding JWT authentication with Auth0.
-
Google Auth
Authenticating a full-stack serverless app with Google.
-
GitHub Auth
Authenticating a full-stack serverless app with GitHub.
Async Tasks
-
Cron
A simple serverless Cron job.
-
Queues
A simple queue system with SQS.
-
Resize Images
Automatically resize images uploaded to S3.
-
Kinesis data streams
A simple Kinesis Data Stream system.
-
EventBus
A simple EventBridge system with EventBus.
Editors
-
Debug With VS Code
Using VS Code to debug serverless apps.
-
Debug With WebStorm
Using WebStorm to debug serverless apps.
-
Debug With IntelliJ
Using IntelliJ IDEA to debug serverless apps.
Monitoring
Miscellaneous
-
Lambda Layers
Using the chrome-aws-lambda layer to take screenshots.
-
Middy Validator
Use Middy to validate API request and responses.


