


How to create a serverless GraphQL API with AWS AppSync
In this example we’ll look at how to create an AppSync GraphQL API on AWS using Serverless Stack (SST). We’ll be allowing our users to get, create, update, delete, and list notes.
We’ll be using SST’s Live Lambda Development. It allows you to make changes and test AppSync locally without having to redeploy.
Here is a video of it in action.
Requirements
- Node.js >= 10.15.1
- We’ll be using TypeScript
- An AWS account with the AWS CLI configured locally
Create an SST app
 Let’s start by creating an SST app.
$ npm init sst -- typescript-starter graphql-appsync
$ cd graphql-appsync
By default our app will be deployed to an environment (or stage) called dev and the us-east-1 AWS region. This can be changed in the sst.json in your project root.
{
  "name": "graphql-appsync",
  "region": "us-east-1",
  "main": "stacks/index.ts"
}
Project layout
An SST app is made up of two parts.
-
stacks/— App InfrastructureThe code that describes the infrastructure of your serverless app is placed in the
stacks/directory of your project. SST uses AWS CDK, to create the infrastructure. -
backend/— App CodeThe code that’s run when your API is invoked is placed in the
backend/directory of your project.
Setting up our infrastructure
Let’s start by defining our AppSync API.
Replace the stacks/MyStack.ts with the following.
import { StackContext, Table, AppSyncApi } from "@serverless-stack/resources";

export function MyStack({ stack }: StackContext) {
  // Create a notes table
  const notesTable = new Table(stack, "Notes", {
    fields: {
      id: "string",
    },
    primaryIndex: { partitionKey: "id" },
  });

  // Create the AppSync GraphQL API
  const api = new AppSyncApi(stack, "AppSyncApi", {
    schema: "backend/graphql/schema.graphql",
    defaults: {
      function: {
        environment: {
          NOTES_TABLE: notesTable.tableName,
        },
      },
    },
    dataSources: {
      notes: "functions/lambda.handler",
    },
    resolvers: {
      "Query    listNotes": "notes",
      "Query    getNoteById": "notes",
      "Mutation createNote": "notes",
      "Mutation updateNote": "notes",
      "Mutation deleteNote": "notes",
    },
  });

  // Enable the AppSync API to access the DynamoDB table
  api.attachPermissions([notesTable]);

  // Show the AppSync API Id and API Key in the output
  stack.addOutputs({
    ApiId: api.apiId,
    ApiKey: api.cdk.graphqlApi.apiKey,
    APiUrl: api.url,
  });
}
We are creating an AppSync GraphQL API here using the AppSyncApi construct. We are also creating a DynamoDB table using the Table construct. It’ll store the notes we’ll be creating with our GraphQL API.
Finally, we allow our API to access our table.
Define the GraphQL schema
Add the following to backend/graphql/schema.graphql.
type Note {
  id: ID!
  content: String!
}

input NoteInput {
  id: ID!
  content: String!
}

input UpdateNoteInput {
  id: ID!
  content: String
}

type Query {
  listNotes: [Note]
  getNoteById(noteId: String!): Note
}

type Mutation {
  createNote(note: NoteInput!): Note
  deleteNote(noteId: String!): String
  updateNote(note: UpdateNoteInput!): Note
}
Let’s also add a type for our note object.
Add the following to a new file in backend/Note.ts.
type Note = {
  id: string;
  content: string;
};

export default Note;
Adding the function handler
To start with, let’s create the Lambda function that’ll be our AppSync data source.
Replace backend/functions/lambda.ts with the following.
import Note from "./Note";
import listNotes from "./listNotes";
import createNote from "./createNote";
import updateNote from "./updateNote";
import deleteNote from "./deleteNote";
import getNoteById from "./getNoteById";

type AppSyncEvent = {
  info: {
    fieldName: string;
  };
  arguments: {
    note: Note;
    noteId: string;
  };
};

export async function handler(
  event: AppSyncEvent
): Promise<Record<string, unknown>[] | Note | string | null | undefined> {
  switch (event.info.fieldName) {
    case "listNotes":
      return await listNotes();
    case "createNote":
      return await createNote(event.arguments.note);
    case "updateNote":
      return await updateNote(event.arguments.note);
    case "deleteNote":
      return await deleteNote(event.arguments.noteId);
    case "getNoteById":
      return await getNoteById(event.arguments.noteId);
    default:
      return null;
  }
}
Now let’s implement our resolvers.
Create a note
Starting with the one that’ll create a note.
Add a file to backend/createNote.ts.
import { DynamoDB } from "aws-sdk";
import Note from "./Note";

const dynamoDb = new DynamoDB.DocumentClient();

export default async function createNote(note: Note): Promise<Note> {
  const params = {
    Item: note as Record<string, unknown>,
    TableName: process.env.NOTES_TABLE as string,
  };

  await dynamoDb.put(params).promise();

  return note;
}
Here, we are storing the given note in our DynamoDB table.
Let’s install the aws-sdk package in the backend/ folder package that we are using.
$ npm install aws-sdk
Read the list of notes
Next, let’s write the function that’ll fetch all our notes.
Add the following to backend/listNotes.ts.
import { DynamoDB } from "aws-sdk";

const dynamoDb = new DynamoDB.DocumentClient();

export default async function listNotes(): Promise<
  Record<string, unknown>[] | undefined
> {
  const params = {
    TableName: process.env.NOTES_TABLE as string,
  };

  const data = await dynamoDb.scan(params).promise();

  return data.Items;
}
Here we are getting all the notes from our table.
Read a specific note
We’ll do something similar for the function that gets a single note.
Create a backend/getNoteById.ts.
import { DynamoDB } from "aws-sdk";
import Note from "./Note";

const dynamoDb = new DynamoDB.DocumentClient();

export default async function getNoteById(
  noteId: string
): Promise<Note | undefined> {
  const params = {
    Key: { id: noteId },
    TableName: process.env.NOTES_TABLE as string,
  };

  const { Item } = await dynamoDb.get(params).promise();

  return Item as Note;
}
We are getting the note with the id that’s passed in.
Update a note
Now let’s update our notes.
Add a backend/updateNote.ts with:
import { DynamoDB } from "aws-sdk";
import Note from "./Note";

const dynamoDb = new DynamoDB.DocumentClient();

export default async function updateNote(note: Note): Promise<Note> {
  const params = {
    Key: { id: note.id },
    ReturnValues: "UPDATED_NEW",
    UpdateExpression: "SET content = :content",
    TableName: process.env.NOTES_TABLE as string,
    ExpressionAttributeValues: { ":content": note.content },
  };

  await dynamoDb.update(params).promise();

  return note as Note;
}
We are using the id and the content of the note that’s passed in to update a note.
Delete a note
To complete all the operations, let’s delete the note.
Add this to backend/deleteNote.ts.
import { DynamoDB } from "aws-sdk";

const dynamoDb = new DynamoDB.DocumentClient();

export default async function deleteNote(noteId: string): Promise<string> {
  const params = {
    Key: { id: noteId },
    TableName: process.env.NOTES_TABLE as string,
  };

  // await dynamoDb.delete(params).promise();

  return noteId;
}
Note that, we are purposely disabling the delete query for now. We’ll come back to this later.
Let’s install the aws-sdk package in the backend/ folder.
$ npm install aws-sdk
Let’s test what we’ve created so far!
Starting your dev environment
SST features a Live Lambda Development environment that allows you to work on your serverless apps live.
$ npm start
The first time you run this command it’ll take a couple of minutes to deploy your app and a debug stack to power the Live Lambda Development environment.
===============
 Deploying app
===============

Preparing your SST app
Transpiling source
Linting source
Deploying stacks
dev-graphql-appsync-my-stack: deploying...

 ✅  dev-graphql-appsync-my-stack


Stack dev-graphql-appsync-my-stack
  Status: deployed
  Outputs:
    ApiId: lk2fgfxsizdstfb24c4y4dnad4
    ApiKey: da2-3oknz5th4nbj5oobjz4jwid62q
    ApiUrl: https://2ngraxbyo5cwdpsk47wgn3oafu.appsync-api.us-east-1.amazonaws.com/graphql
The ApiId is the Id of the AppSync API we just created, the ApiKey is the API key of our AppSync API and ApiUrl is the AppSync API URL.
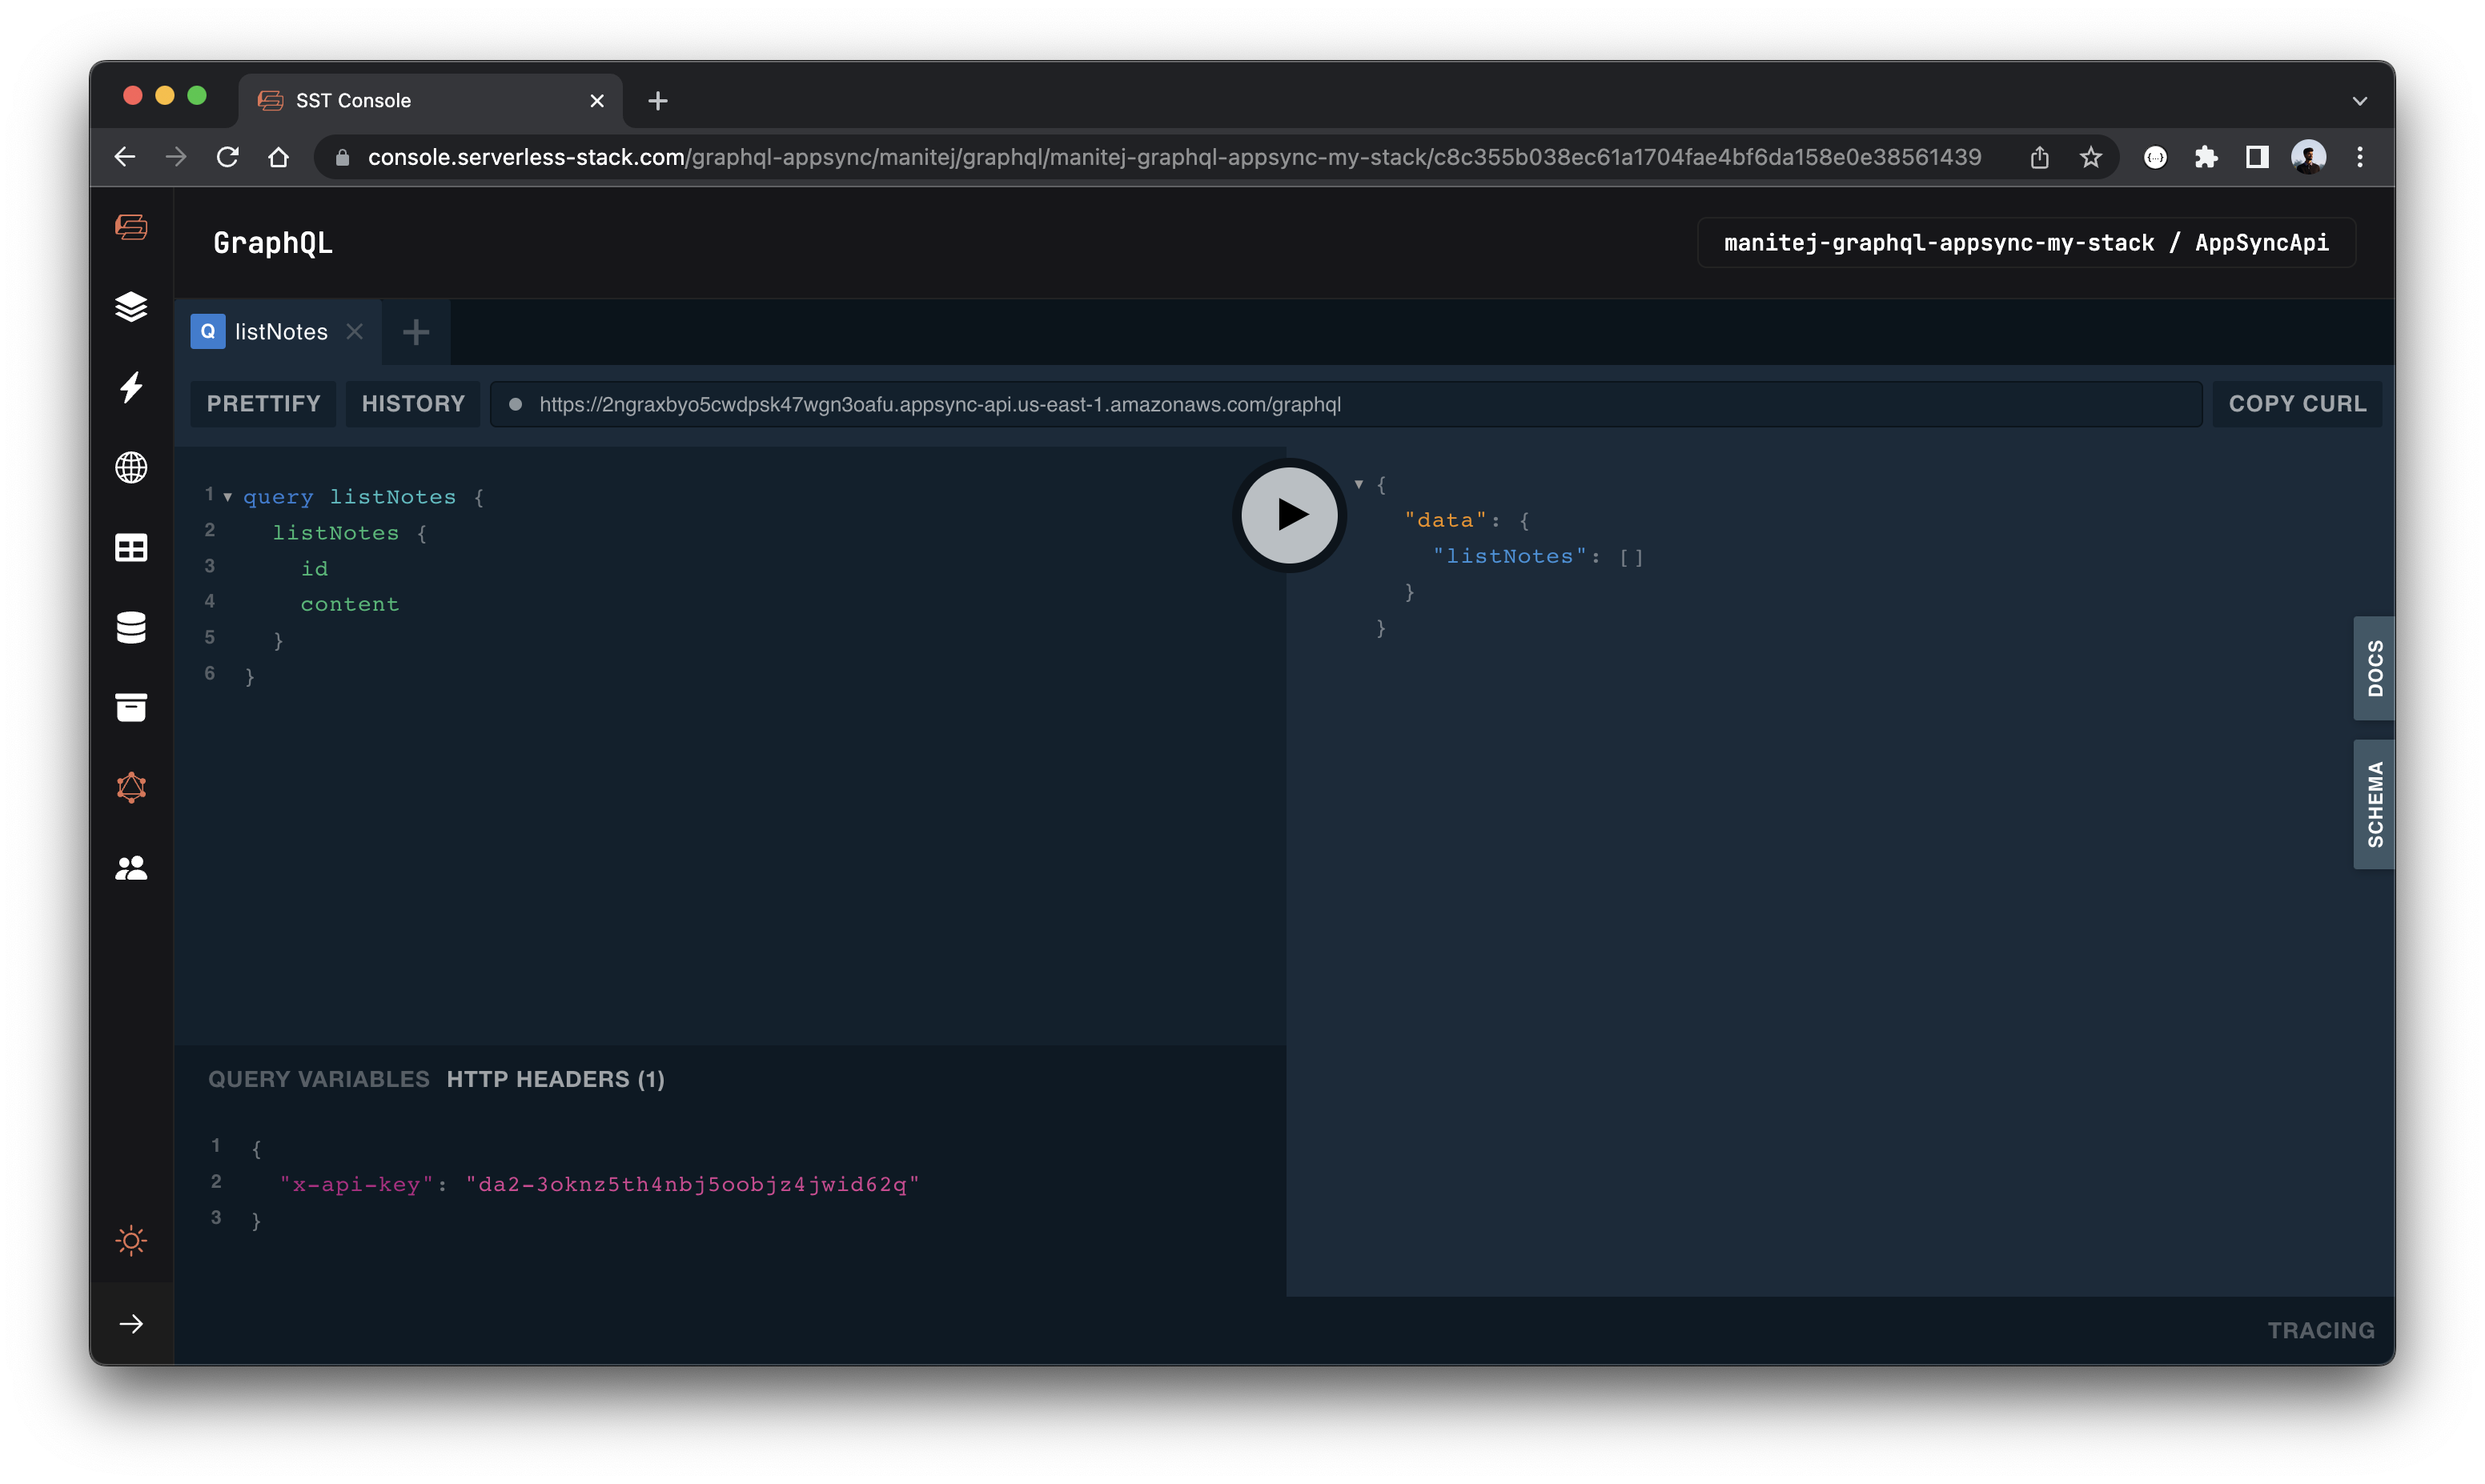
Let’s test our endpoint with the SST Console. The SST Console is a web based dashboard to manage your SST apps. Learn more about it in our docs.
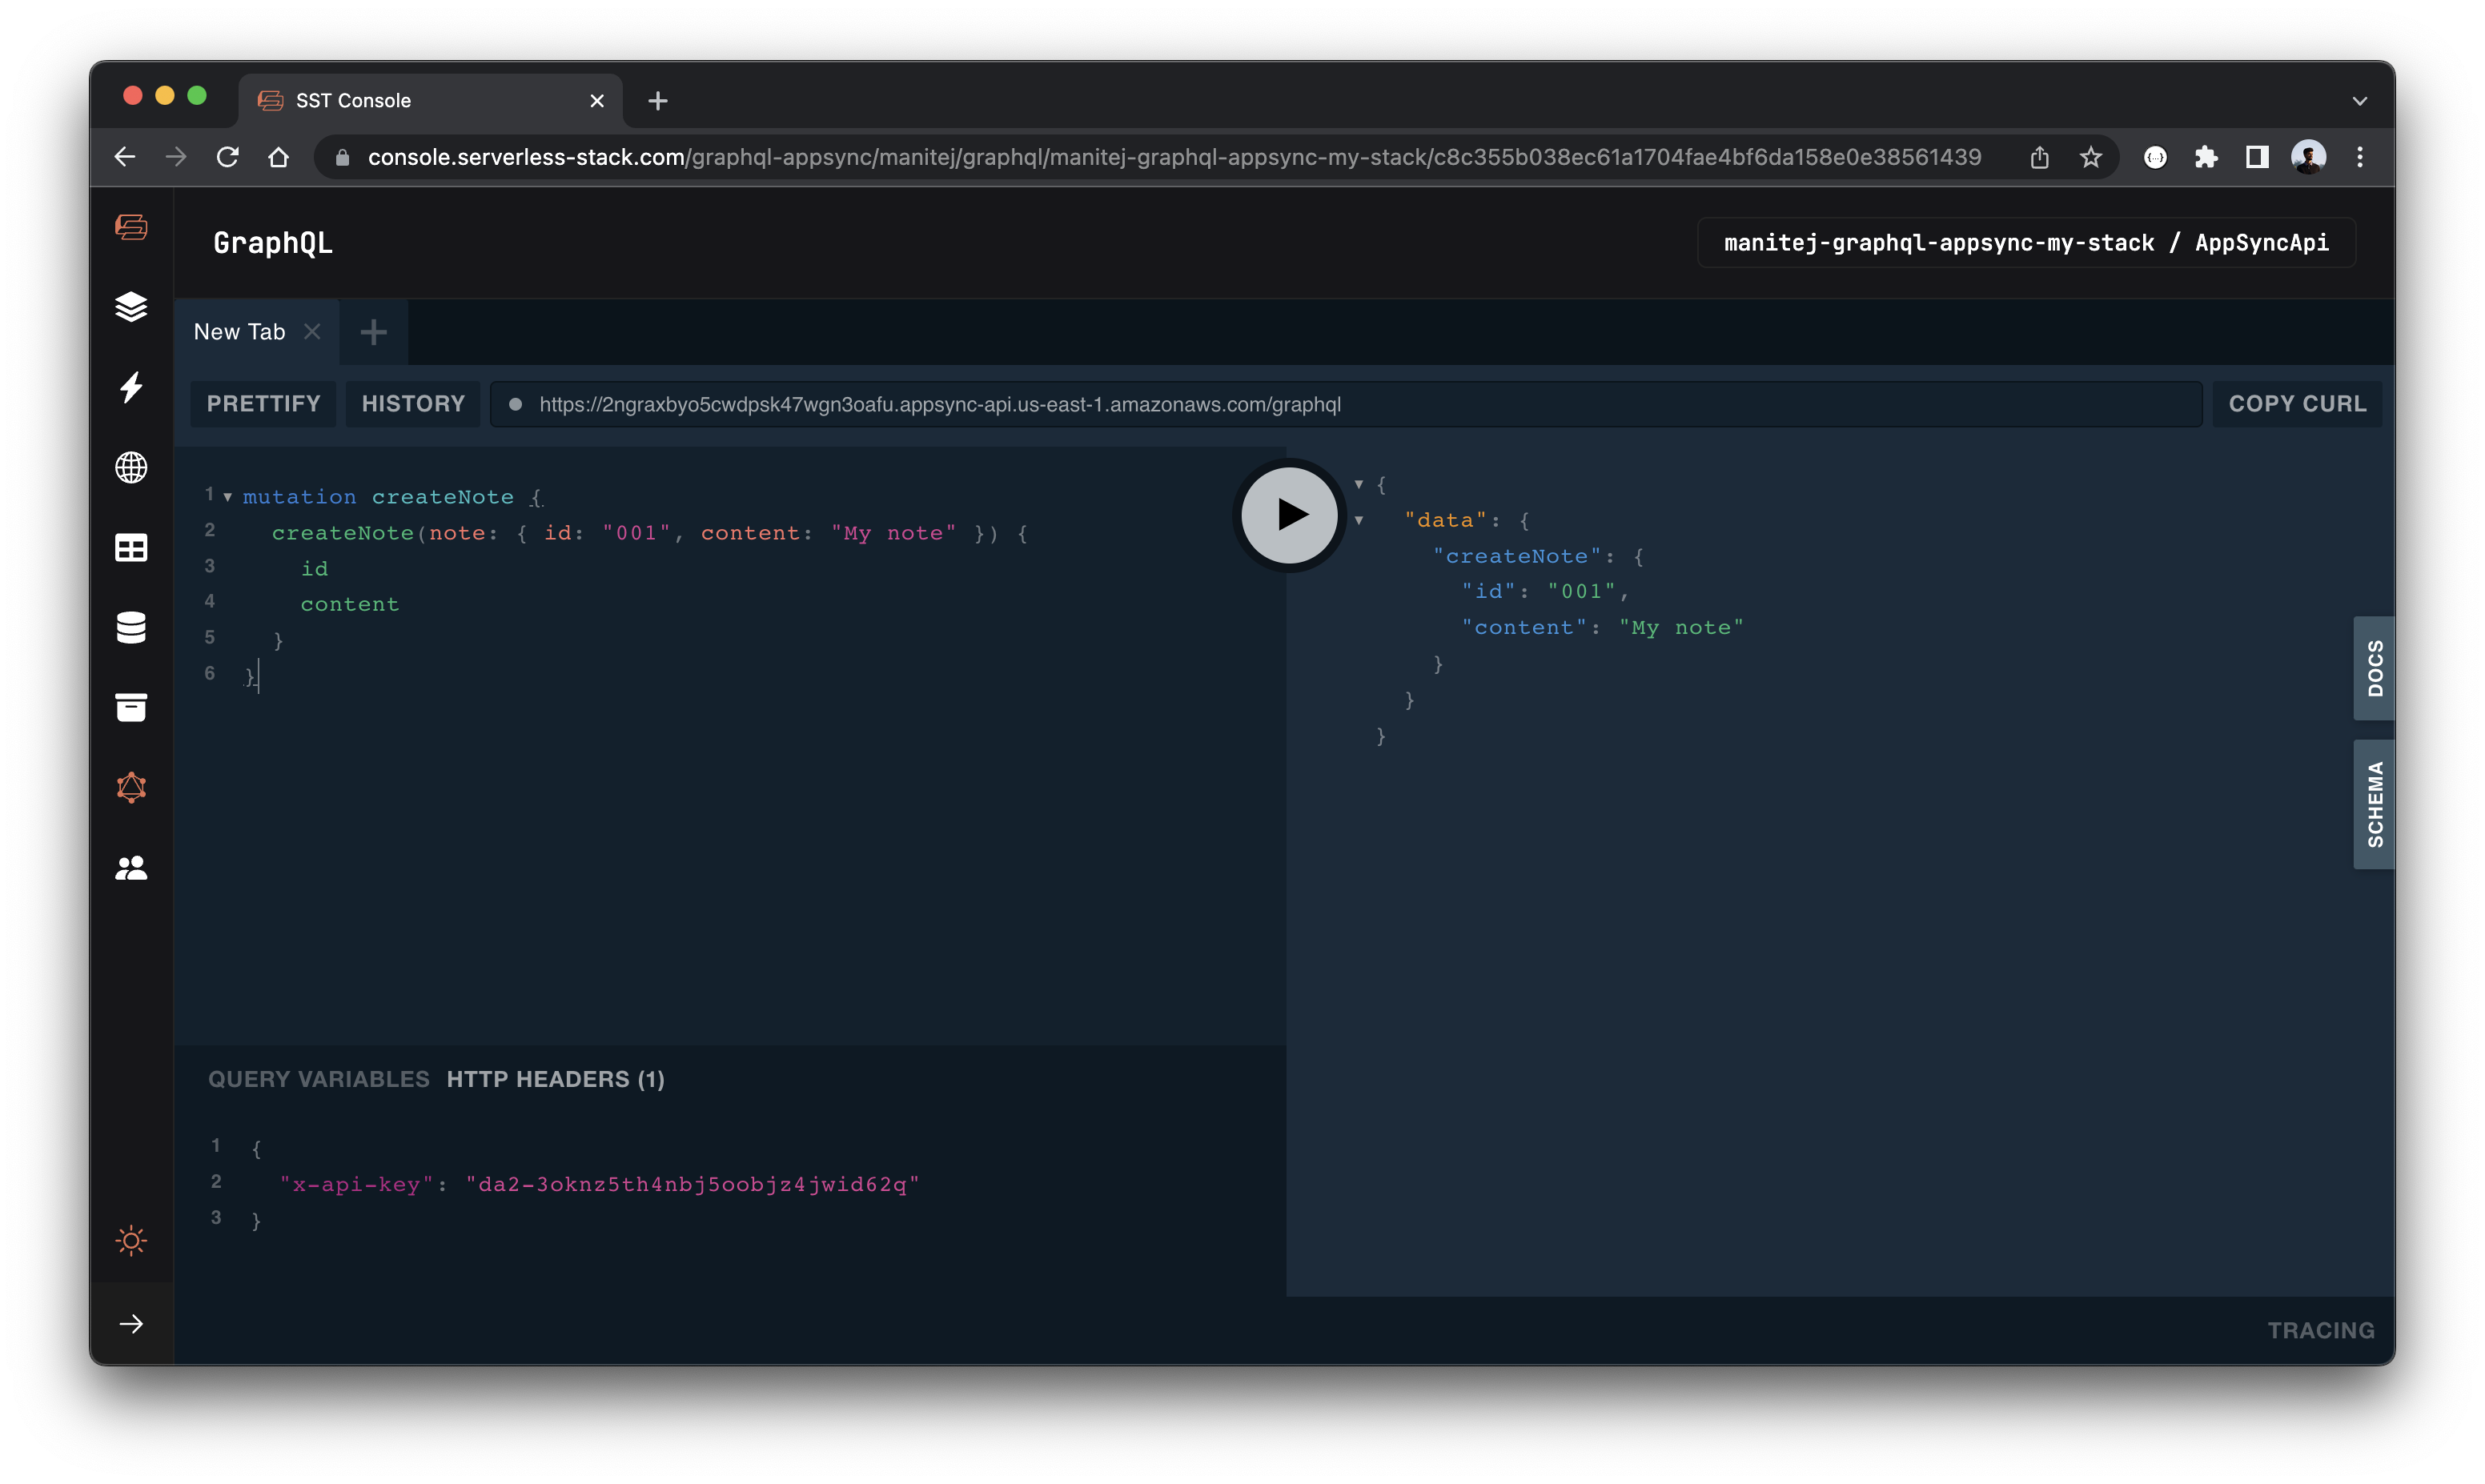
Go to the GraphQL tab and you should see the GraphQL Playground in action.
Note, The GraphQL explorer lets you query GraphQL endpoints created with the GraphQLApi and AppSyncApi constructs in your app.
Let’s start by creating a note. Paste the below mutation in the left part of the playground.
mutation createNote {
  createNote(note: { id: "001", content: "My note" }) {
    id
    content
  }
}
Also let’s go to the DynamoDB tab in the SST Console and check that the value has been created in the table.
Note, The DynamoDB explorer allows you to query the DynamoDB tables in the Table constructs in your app. You can scan the table, query specific keys, create and edit items.

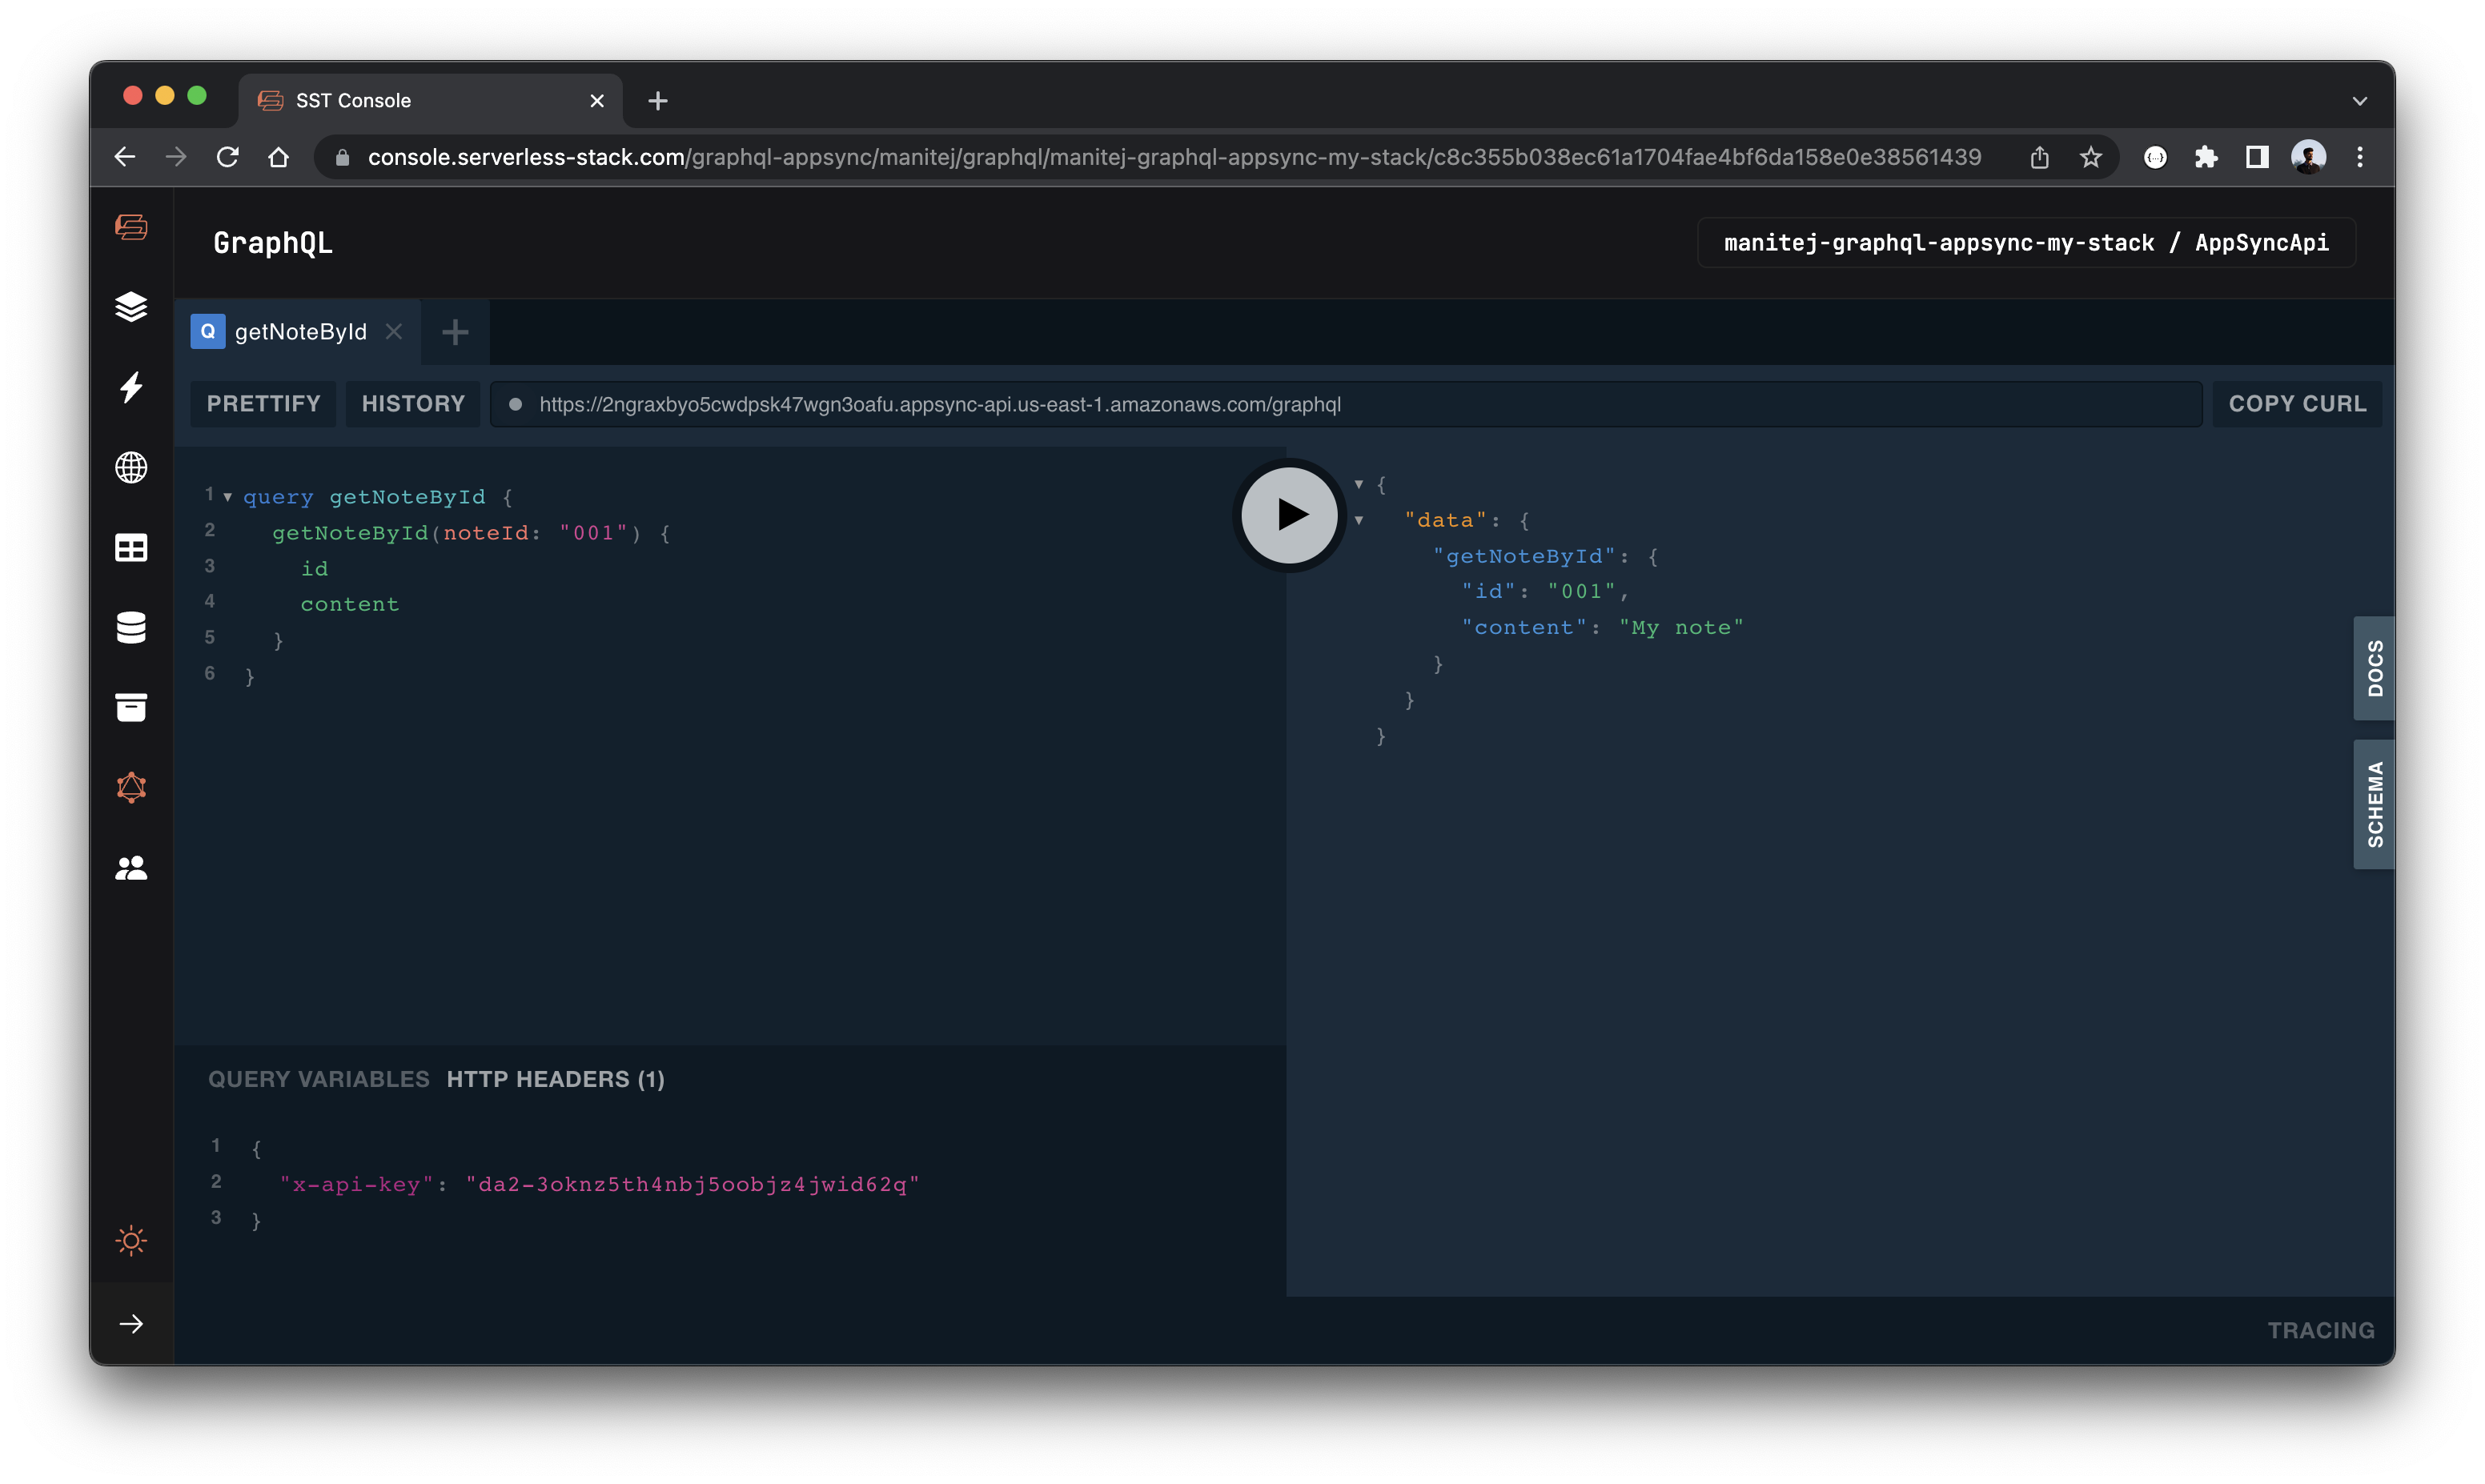
And let’s get the note we just created by running this query instead.
query getNoteById {
  getNoteById(noteId: "001") {
    id
    content
  }
}
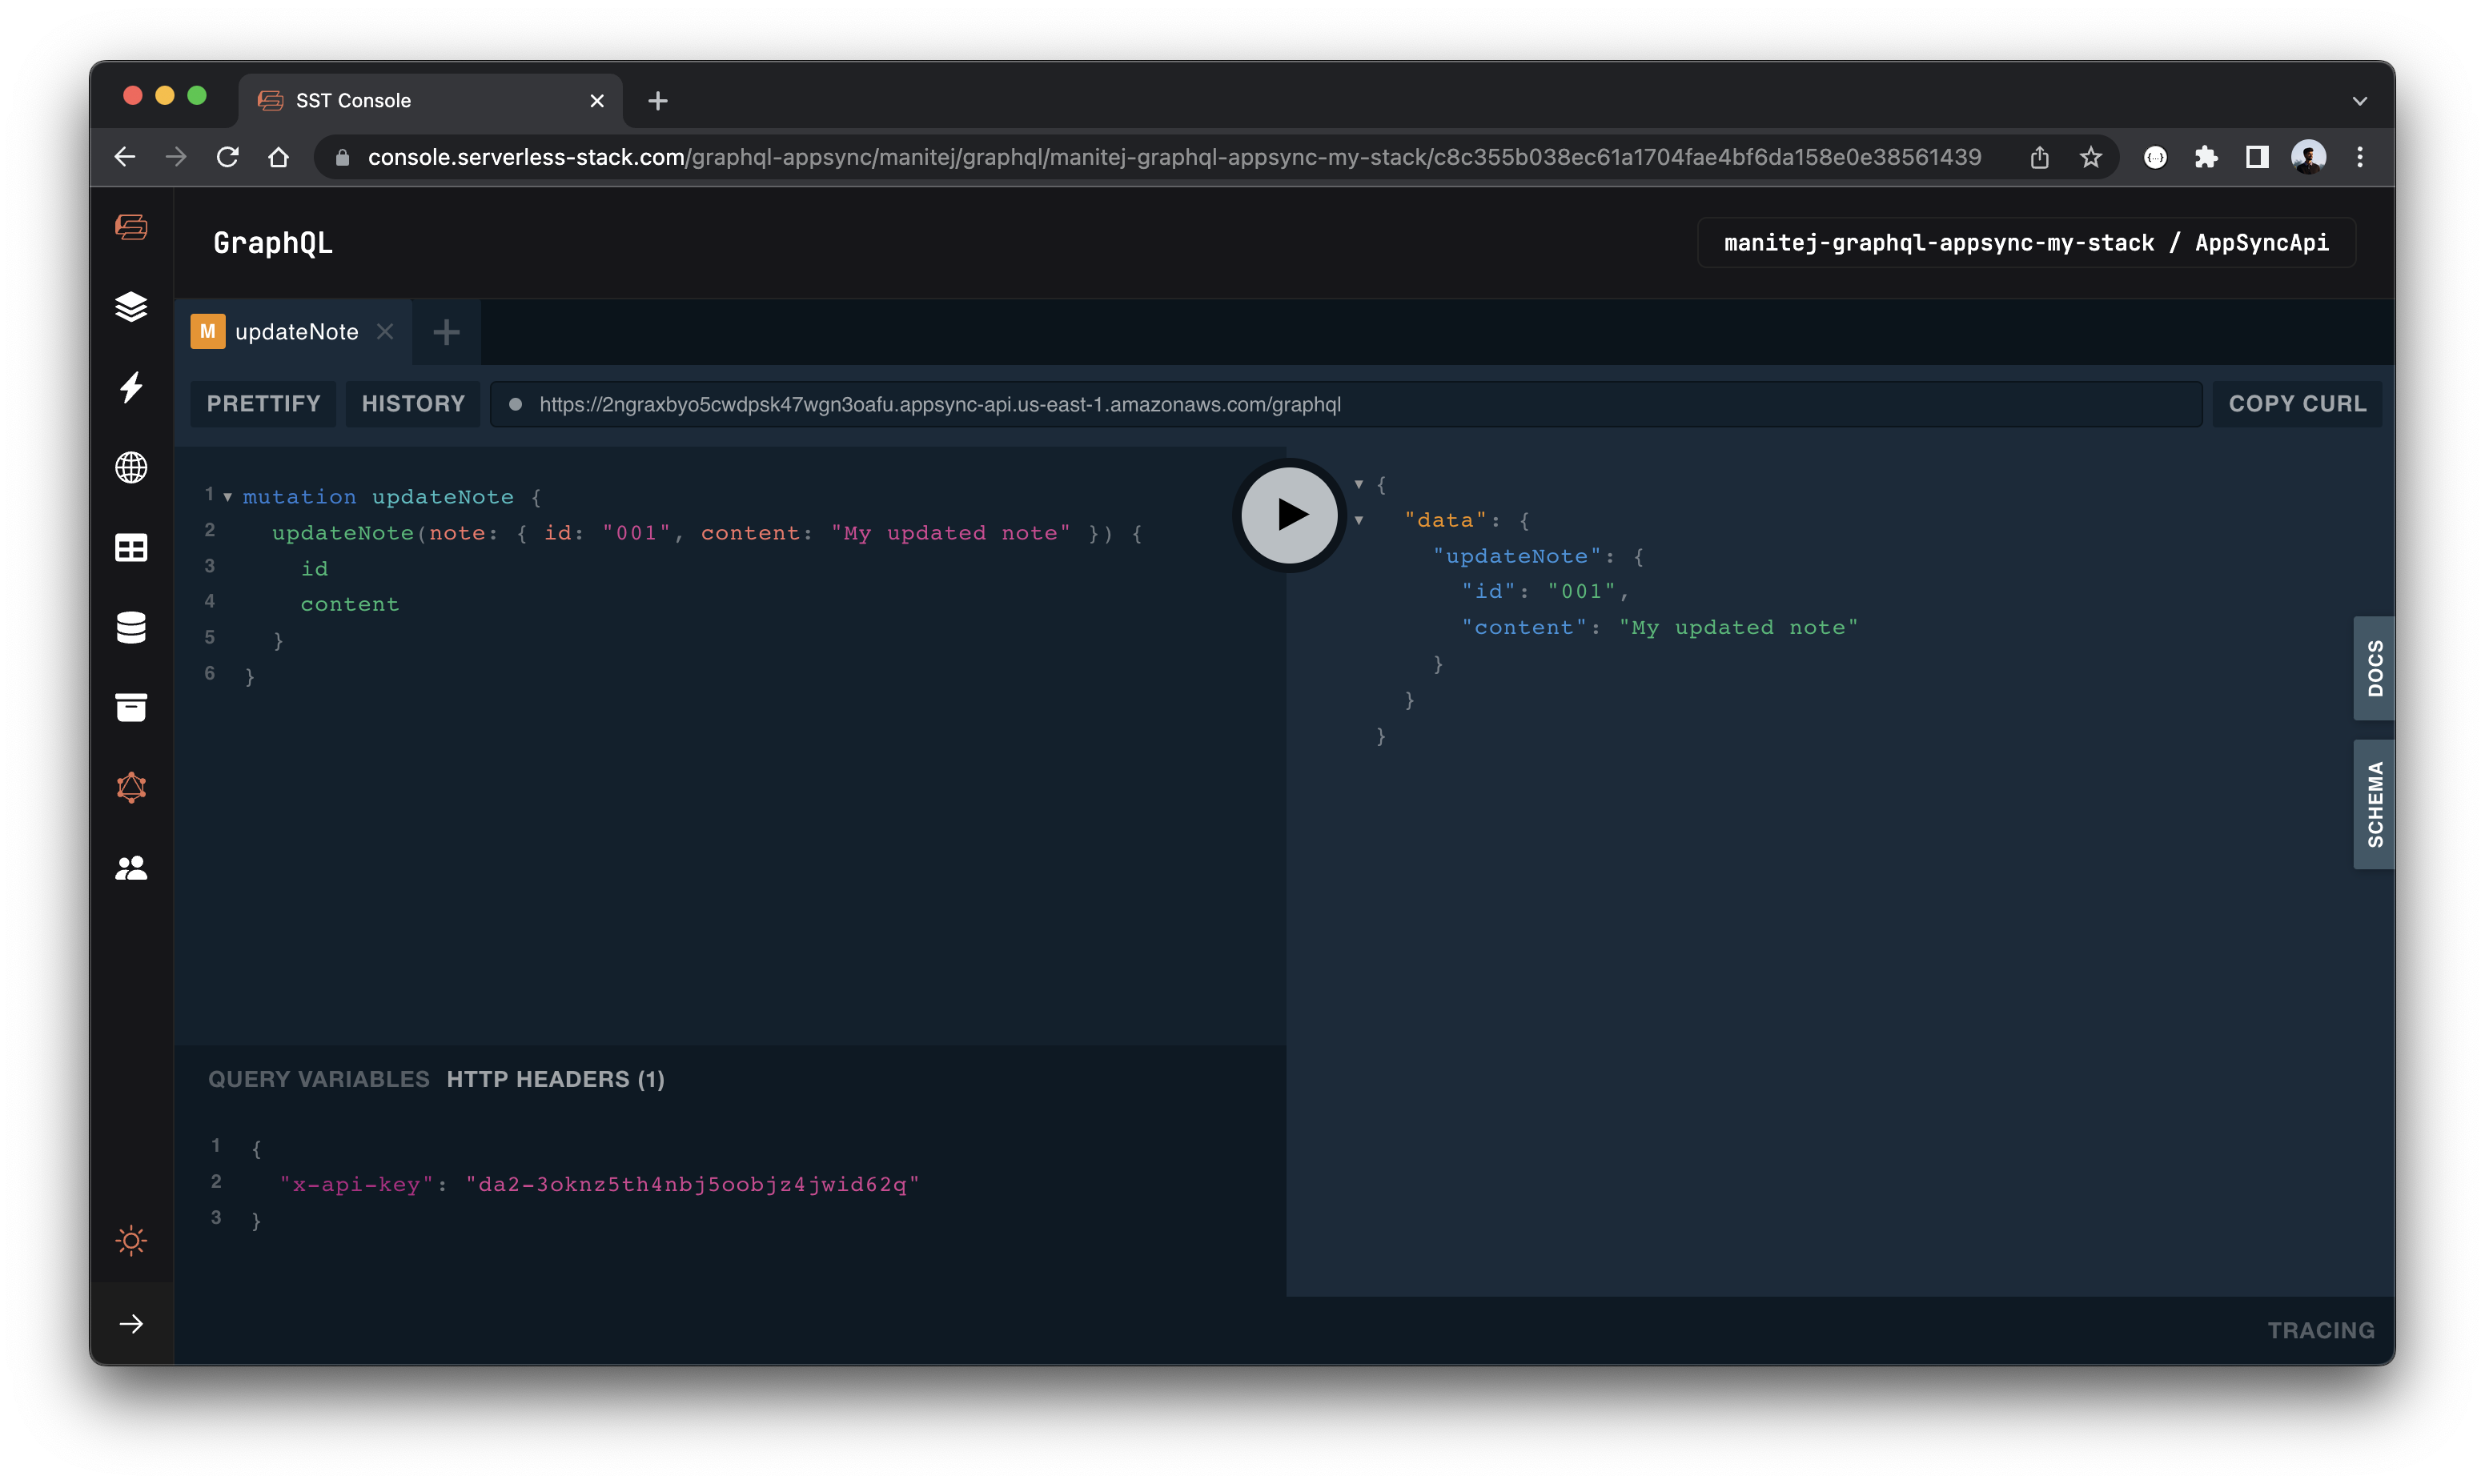
Let’s test our update mutation by running:
mutation updateNote {
  updateNote(note: { id: "001", content: "My updated note" }) {
    id
    content
  }
}
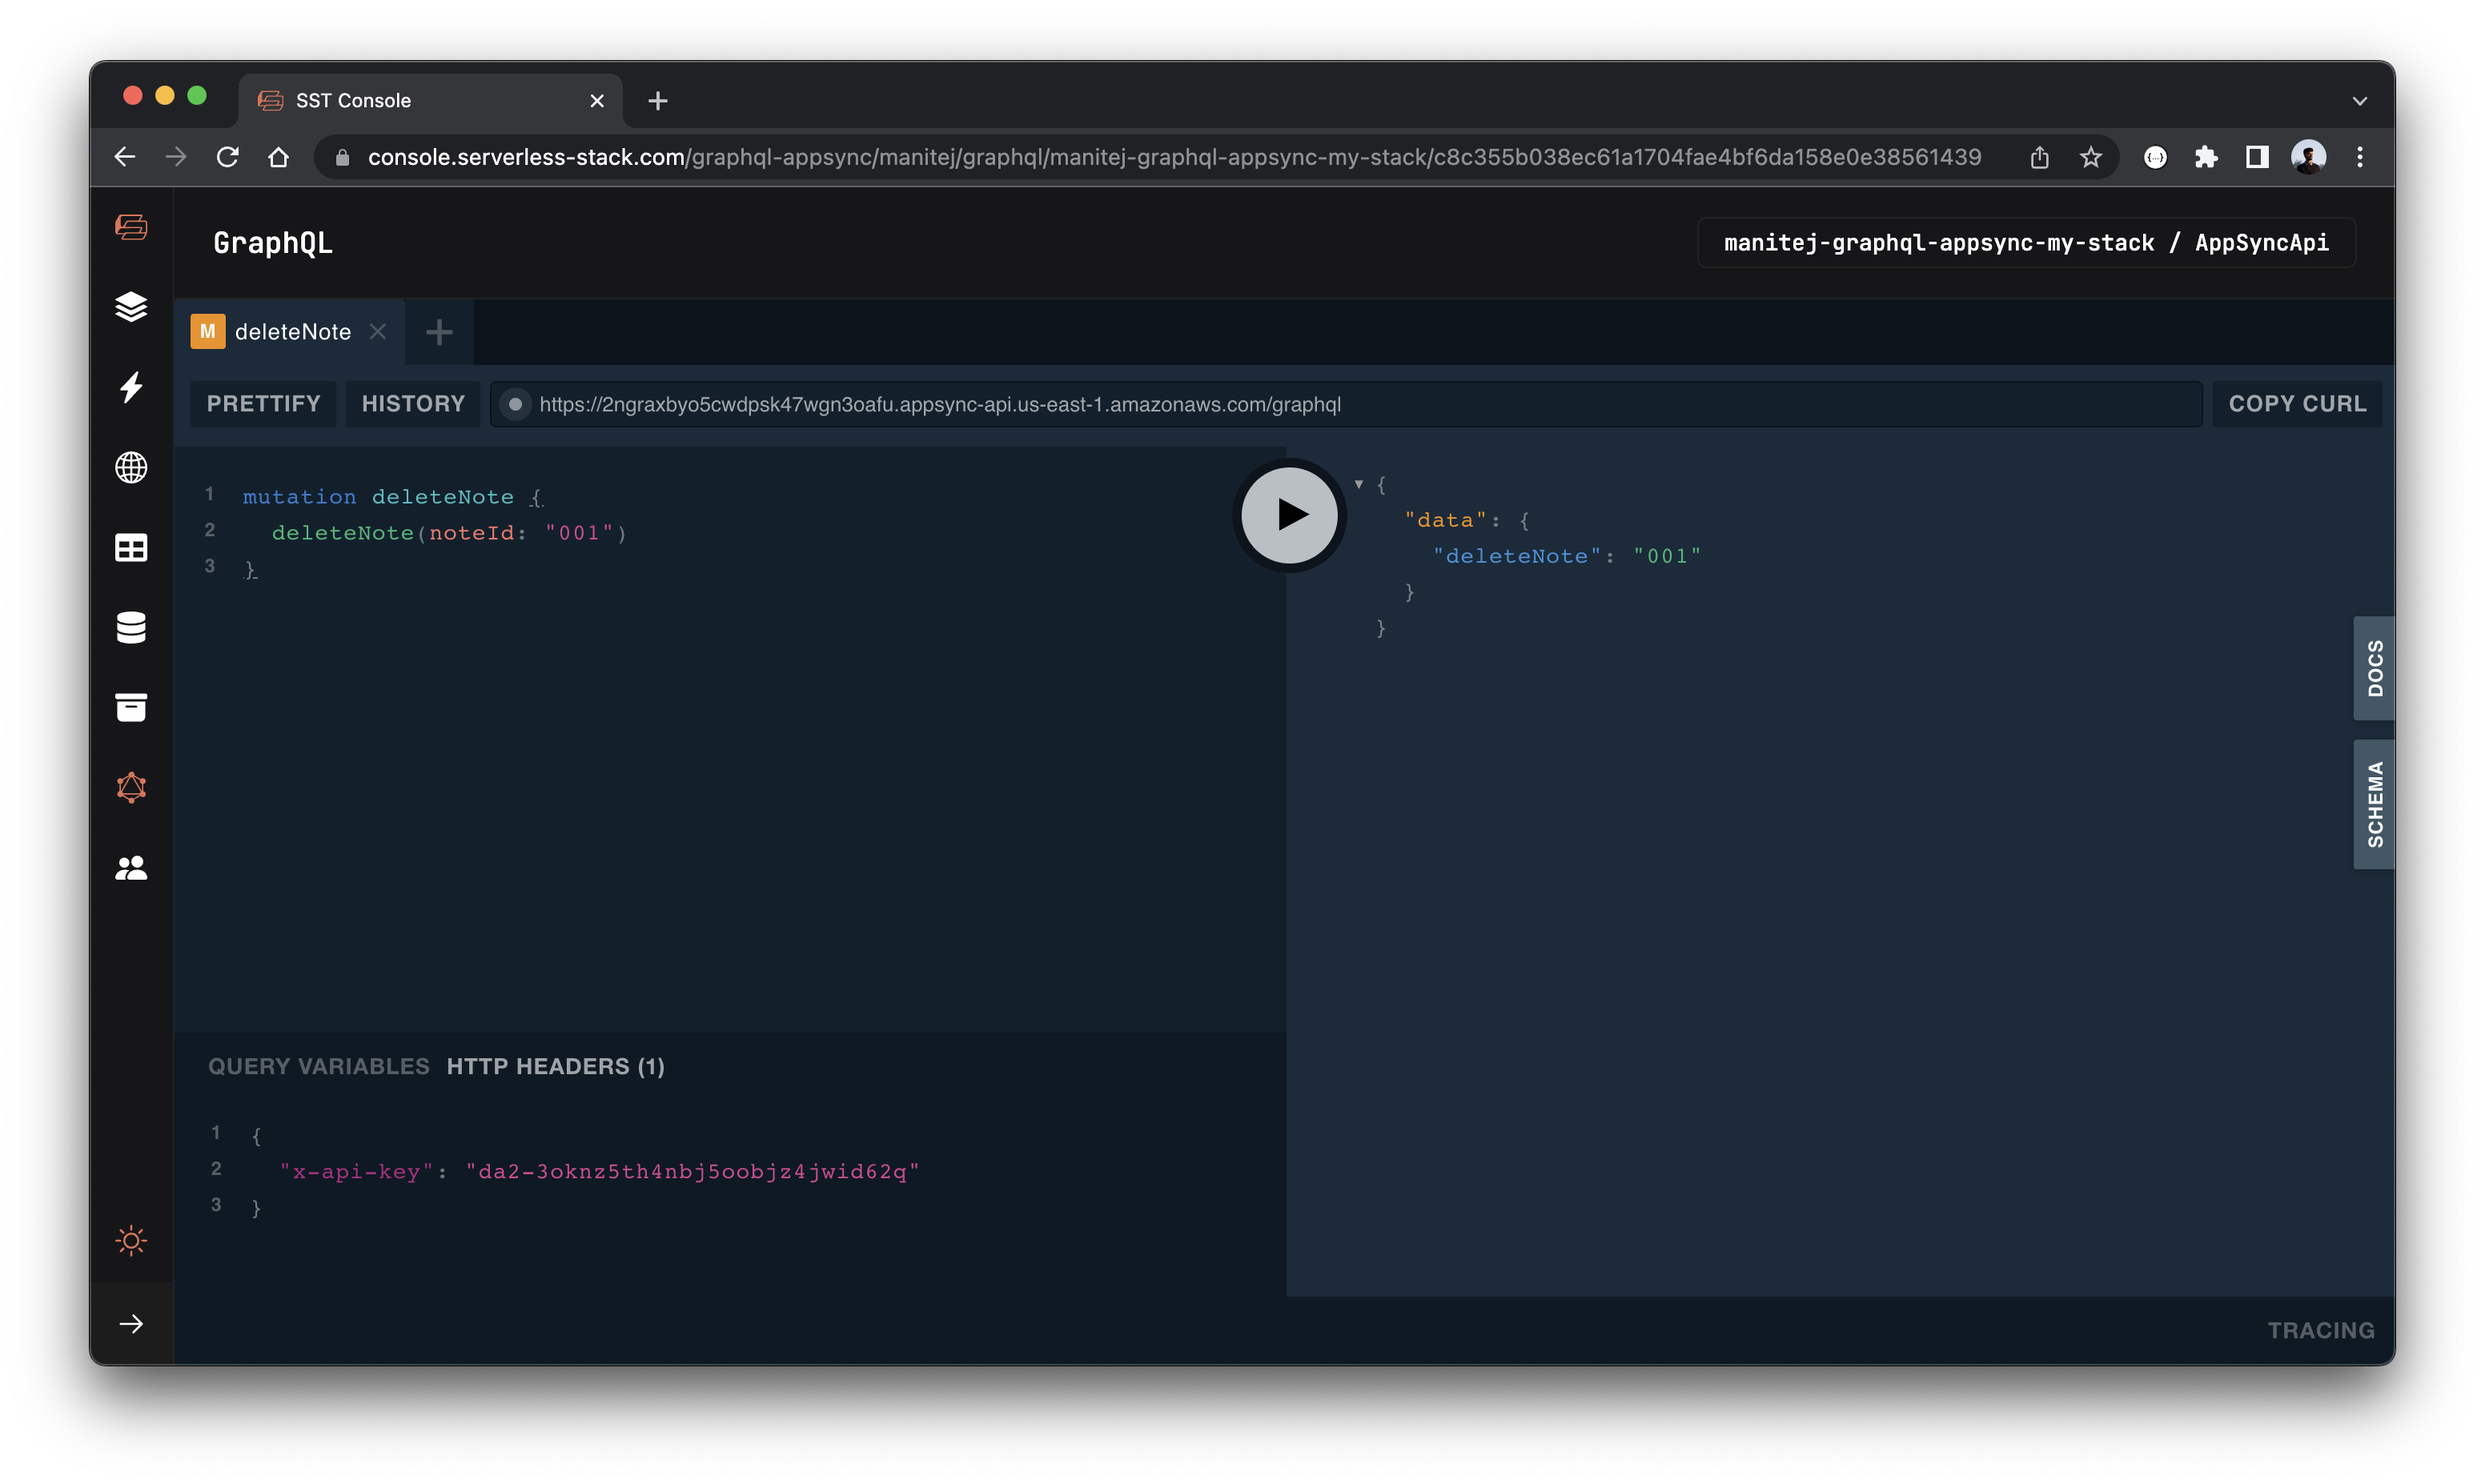
Now let’s try deleting our note.
mutation deleteNote {
  deleteNote(noteId: "001")
}
Let’s test if the delete worked by getting all the notes.
query listNotes {
  listNotes {
    id
    content
  }
}

You’ll notice a couple of things. Firstly, the note we created is still there. This is because our deleteNote method isn’t actually running our query. Secondly, our note should have the updated content from our previous query.
Making changes
Let’s fix our backend/deleteNote.ts by un-commenting the query.
await dynamoDb.delete(params).promise();
If you head back to the query editor and run the delete mutation again.
mutation deleteNote {
  deleteNote(noteId: "001")
}
And running the list query should now show that the note has been removed!
query listNotes {
  listNotes {
    id
    content
  }
}
Notice we didn’t need to redeploy our app to see the change.
Deploying your API
Now that our API is tested, let’s deploy it to production. You’ll recall that we were using a dev environment, the one specified in our sst.json. However, we are going to deploy it to a different environment. This ensures that the next time we are developing locally, it doesn’t break the API for our users.
Run the following in your terminal.
$ npm run deploy -- --stage prod
Cleaning up
Finally, you can remove the resources created in this example using the following commands.
$ npm run remove
$ npm run remove -- --stage prod
Conclusion
And that’s it! You’ve got a brand new serverless GraphQL API built with AppSync. A local development environment, to test and make changes. And it’s deployed to production as well, so you can share it with your users. Check out the repo below for the code we used in this example. And leave a comment if you have any questions!
Example repo for reference
github.com/serverless-stack/serverless-stack/tree/master/examples/graphql-appsyncFor help and discussion
Comments on this exampleMore Examples
APIs
-
REST API
Building a simple REST API.
-
WebSocket API
Building a simple WebSocket API.
-
Go REST API
Building a REST API with Golang.
-
Custom Domains
Using a custom domain in an API.
Web Apps
-
React.js
Full-stack React app with a serverless API.
-
Next.js
Full-stack Next.js app with DynamoDB.
-
Vue.js
Full-stack Next.js app with a serverless API.
-
Svelte
Full-stack Svelte app with a serverless API.
-
Gatsby
Full-stack Gatsby app with a serverless API.
-
Angular
Full-stack Angular app with a serverless API.
Mobile Apps
GraphQL
-
Apollo
Building a serverless GraphQL API with Apollo.
Databases
-
DynamoDB
Using DynamoDB in a serverless API.
-
MongoDB Atlas
Using MongoDB Atlas in a serverless API.
-
PostgreSQL
Using PostgreSQL and Aurora in a serverless API.
-
CRUD DynamoDB
Building a CRUD API with DynamoDB.
-
PlanetScale
Using PlanetScale in a serverless API.
Authentication
Using AWS IAM
-
Cognito IAM
Authenticating with Cognito User Pool and Identity Pool.
-
Facebook Auth
Authenticating a serverless API with Facebook.
-
Twitter Auth
Authenticating a serverless API with Twitter.
-
Auth0 IAM
Authenticating a serverless API with Auth0.
Using JWT
-
Cognito JWT
Adding JWT authentication with Cognito.
-
Auth0 JWT
Adding JWT authentication with Auth0.
-
Google Auth
Authenticating a full-stack serverless app with Google.
-
GitHub Auth
Authenticating a full-stack serverless app with GitHub.
Async Tasks
-
Cron
A simple serverless Cron job.
-
Queues
A simple queue system with SQS.
-
Pub/Sub
A simple pub/sub system with SNS.
-
Resize Images
Automatically resize images uploaded to S3.
-
Kinesis data streams
A simple Kinesis Data Stream system.
-
EventBus
A simple EventBridge system with EventBus.
Editors
-
Debug With VS Code
Using VS Code to debug serverless apps.
-
Debug With WebStorm
Using WebStorm to debug serverless apps.
-
Debug With IntelliJ
Using IntelliJ IDEA to debug serverless apps.
Monitoring
Miscellaneous
-
Lambda Layers
Using the chrome-aws-lambda layer to take screenshots.
-
Middy Validator
Use Middy to validate API request and responses.